


If you are searching for a beginner project in quilling ,then this is a perfect project to try.Double decker quilled jewelry box can be created in multicolors ,shades of single colors or a single color.I have shown my version of jewelry box in shades of pink.

Materials Used:
Quilling paper(colours of your choice)
Slotted tool
Glue
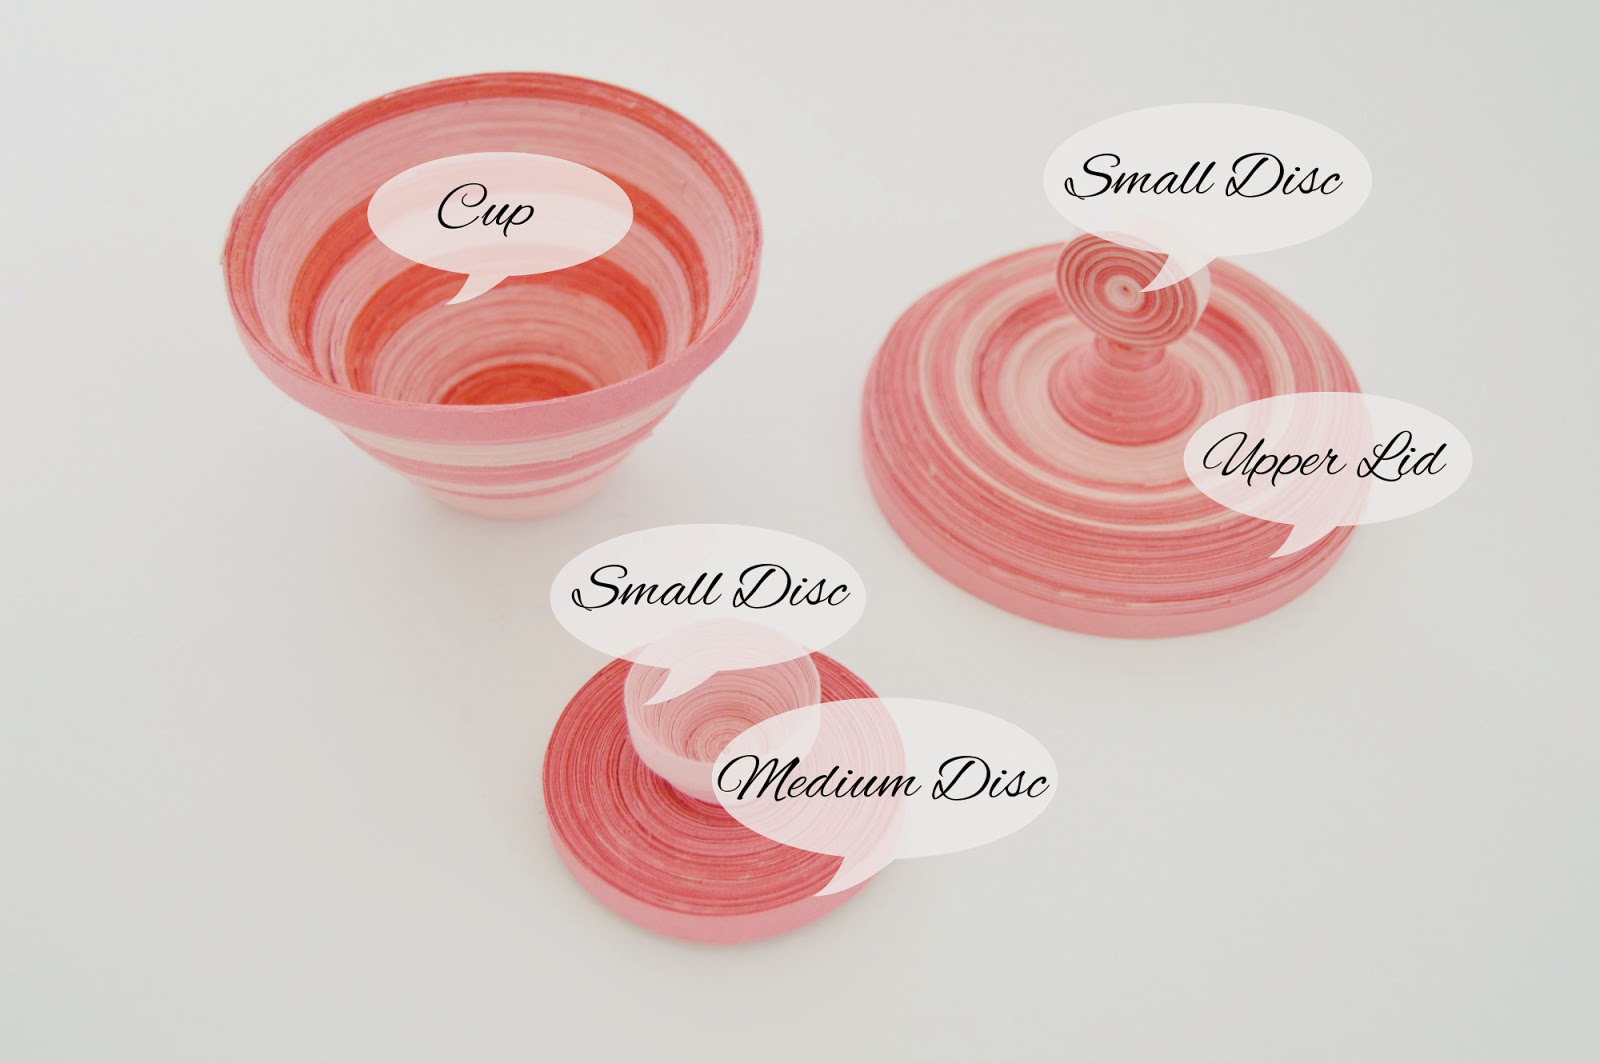
I will use the words described in the picture to describe the steps to make the jewelry box.
Step 1 :
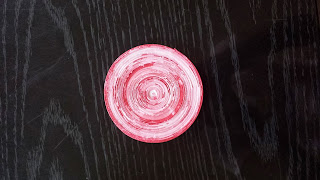
Hold a quilling paper in the slotted tool and start winding.When you reach the end of the trip, glue another strip and wind .Repeat this process till you get a circle with diameter of approx 4 inches(10cm ). Secure the end with glue.This disc is for the cup.
Crafty tip : Don't try to push down when you in the middle of winding process ,you will end up in mess.Because I tried it and repeated half of the winding process again :(


Quilling paper(colours of your choice)
Slotted tool
Glue
I will use the words described in the picture to describe the steps to make the jewelry box.

Step 1 :
Hold a quilling paper in the slotted tool and start winding.When you reach the end of the trip, glue another strip and wind .Repeat this process till you get a circle with diameter of approx 4 inches(10cm ). Secure the end with glue.This disc is for the cup.
Crafty tip : Don't try to push down when you in the middle of winding process ,you will end up in mess.Because I tried it and repeated half of the winding process again :(

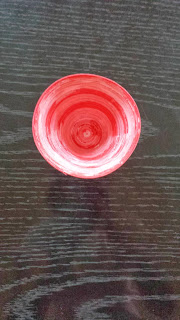
Step 2 :
Apply glue and gently push down to form a cup.You can also apply one more coat of glue after forming the cup.Allow the glue to dry for atleast 24 hours .


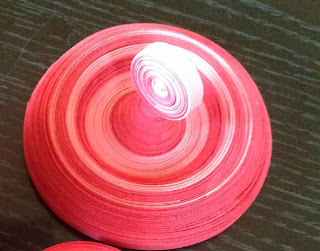
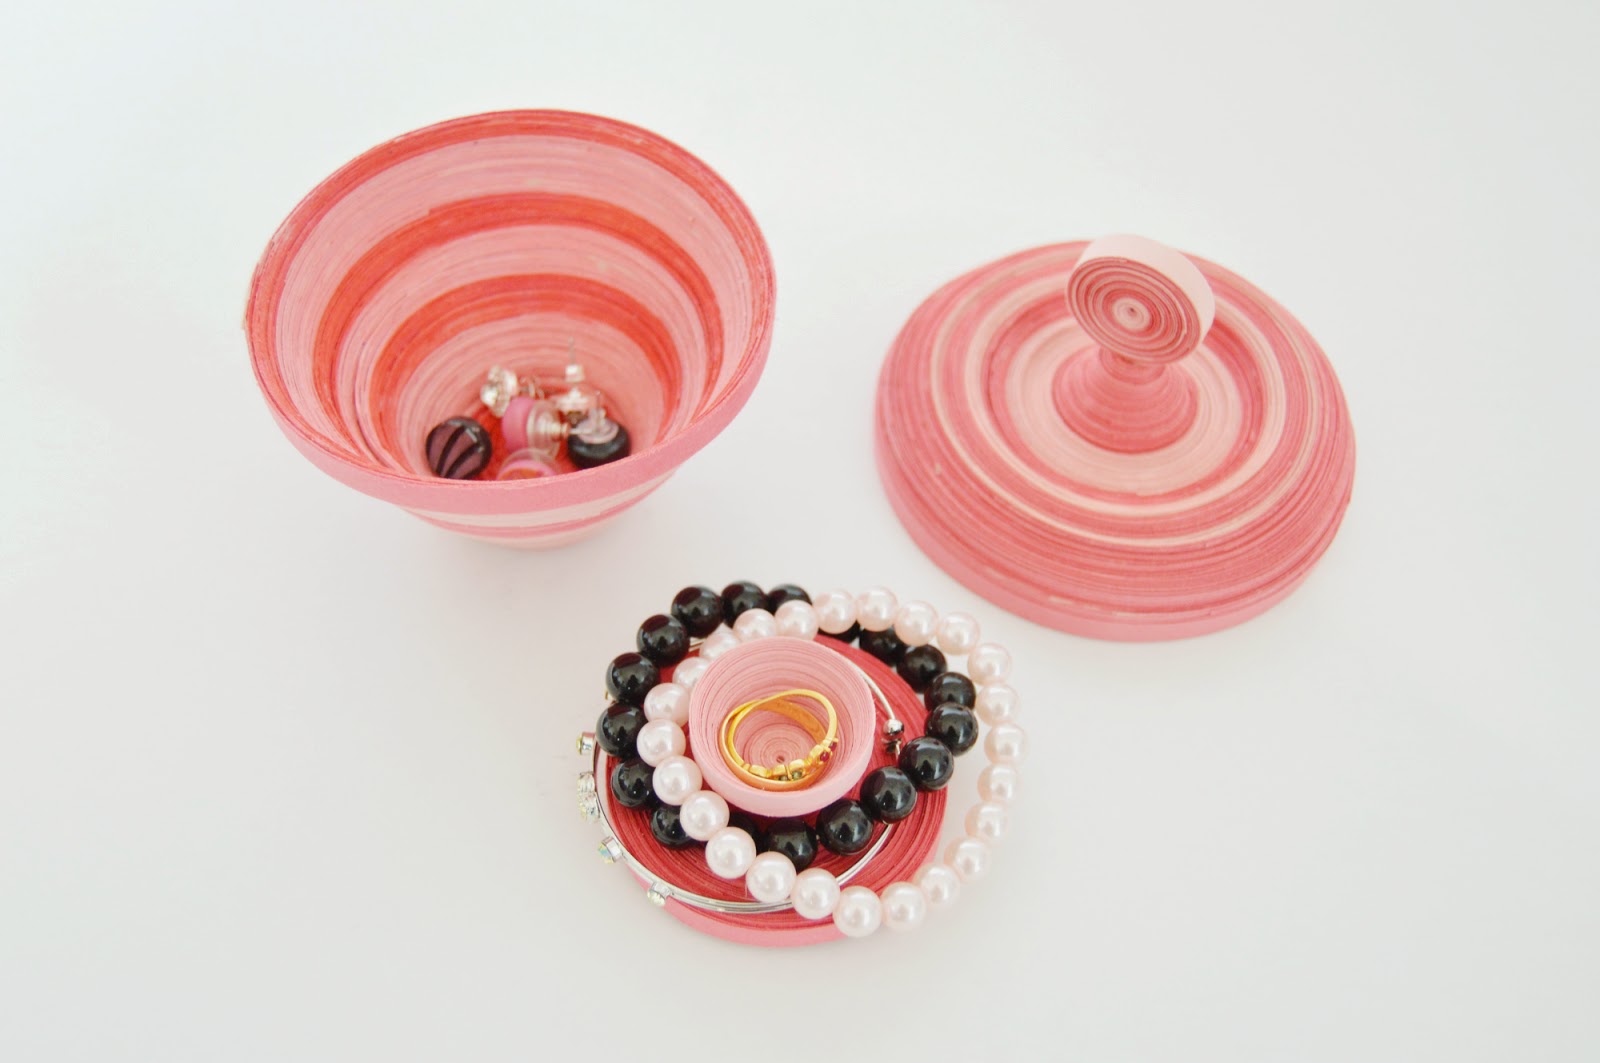
Step 3 : Repeat step 1 and 2 to create a upper lid for the box and inner discs.The upper lid should be little bigger than 4 inches(10cm) in diameter.Approx 4.7 inches (12cm) so that it can close the cup.Another discs include two smaller ones which approx 1.2 inches (3cm) and the medium one is 2.4 inches(6cm) approx.
For the upper lid after applying glue gentle push up and down from outer to the center and create a pointed center.
For the medium disc ,apply glue and leave it flat.For the small disc ,after applying glue gently push down and attach it to the center of the medium disc.
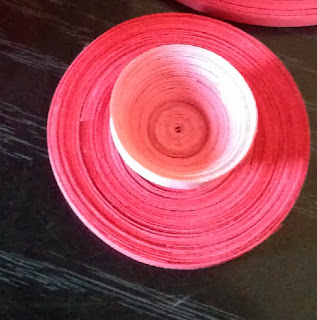
 |
| This picture has the cup,upper lid, the inner disc and a small disc to hold the inner disc. |

Step 4 :Now attach another small disc to the upper lid.Voila!The jewelry box is now ready to use.

This jewelry box is designed such that the cup can hold earrings , the small disc for the rings and the medium disc to hold the bracelet and chains.


Hope you like this simple project and give it a try.Let me know what you think in the comments below.I will be happy to hear from you.Happy Quilling :)
Thank you. I am going to make one this year as I have not got around to it yet.
ReplyDeleteI'm not sure what quilling is, but this is a lovely quilling project! It would be a nice homemade gift idea as well. #HomeMattersParty
ReplyDeleteVery cool! Your projects are always so creative! #HomeMattersParty
ReplyDeleteI have never tried quilling and this project is so creative and useful. Thanks for sharing with us. #HomeMattersParty
ReplyDeleteThese would make such a great gift. I just love these!
ReplyDeleteSahana, your creativity never ceases to amaze me! I've always wanted to try quilling but not sure if I have the patience, but your project totally motivates me to give it a try!! #homemattersparty
ReplyDeleteAmazing Project! It is pretty and does not at all look like paper! Thanks for sharing ! #HomeMattersParty
ReplyDeleteJeannee
How cool, I haven't tried quilling. #HomeMattersPArty
ReplyDeleteI've never done any quilling, but these are so cute! I might just have to give it a try. :) #HomeMattersParty
ReplyDelete~Lorelai
Life With Lorelai
This comment has been removed by a blog administrator.
ReplyDeleteThis comment has been removed by the author.
ReplyDeleteSuch an amazing blog about jewelry box and I really appreciate you work which you have done well. thanks for sharing.
ReplyDeleteonline pvc card printing.