


Today, it is something new and special as I am collaborating for the first time with three beautiful friends from A Kaleidoscopic dream for Fall decor ideas.Check their blog for more fall ideas and also for some great cooking recipes !! you will never stop saying yum-yum!! ;)
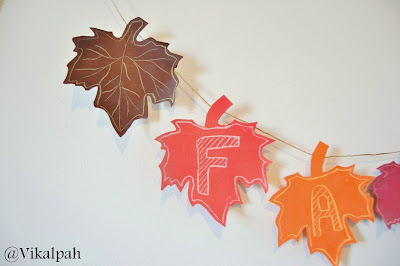
Now to the banner, I tried something different this time compared to the regular banner.We change the banners for every season or for every occasion. And then ,Once it is done, what will you do with that ?? Will you re-use ?? I thought of using chalkboard paint in the banner so that you can reuse them with different designs and also for many other purposes such as place cards or for decor in many other ways.

Materials required :
Card stock in fall colours
Fall leaf template
Clear Chalkboard paint (I used decoart )
Different colour chalks
Scissors
Pencil for tracing
Clear tape
Cord
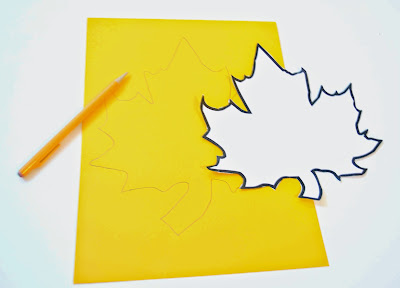
Step 1: Trace the leaf template on to the card stock and cut it with scissors.I cut 6 leaves as I decided to spell "Fall" along with two leaves on either side.


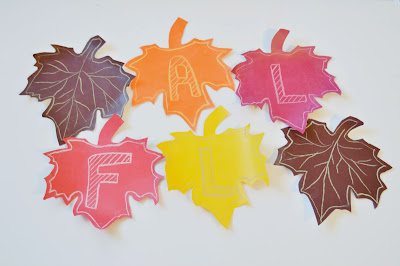
Step 4: Draw your desired design on to the leaves. Try different designs ,different colors and chose your favorite. This is the fun part of using chalkboard.

Note : This is not a sponsored post.
Now to the banner, I tried something different this time compared to the regular banner.We change the banners for every season or for every occasion. And then ,Once it is done, what will you do with that ?? Will you re-use ?? I thought of using chalkboard paint in the banner so that you can reuse them with different designs and also for many other purposes such as place cards or for decor in many other ways.

Card stock in fall colours
Fall leaf template
Clear Chalkboard paint (I used decoart )
Different colour chalks
Scissors
Pencil for tracing
Clear tape
Cord
Step 1: Trace the leaf template on to the card stock and cut it with scissors.I cut 6 leaves as I decided to spell "Fall" along with two leaves on either side.

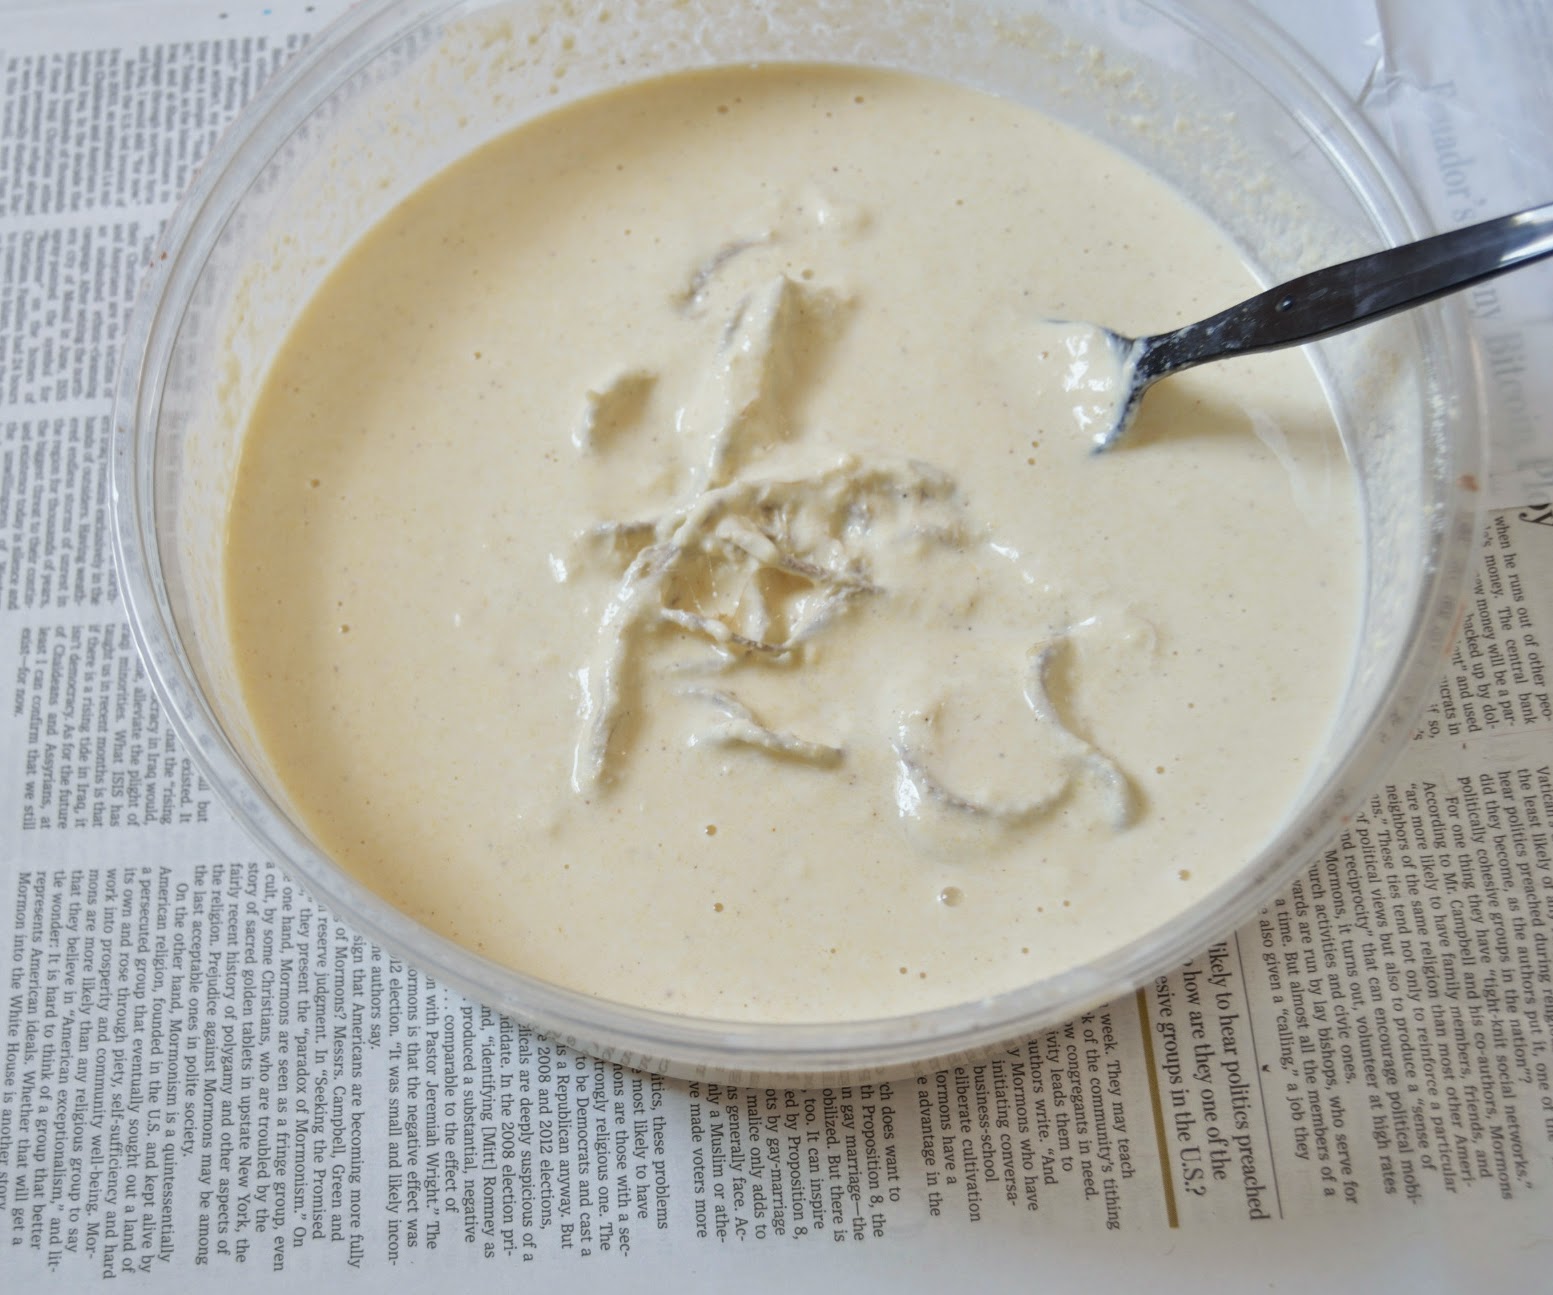
Step 2: Paint the clear chalkboard paint as per the instruction in the package.The beauty of this clear chalkboard paint is you can change any surface into a chalkboard.How cool?? If you have kids at home you should definitely give this a try.I tested using chalk on the paper without painting , It does work but if you try to erase and write many times it will ruin the paper leaving white marks however if you use chalkboard paint you can avoid that.Plus, you can reuse it .So, I will leave this to you.

Step 3: Season the paper leaves with chalk to make it as chalkboard surface.


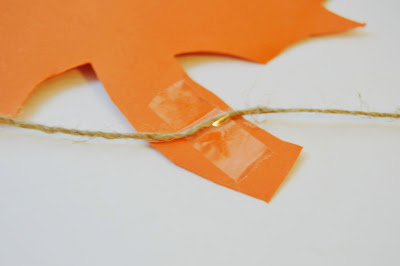
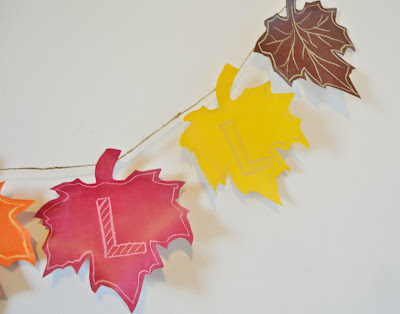
Step 5: Secure each leaf on to the cord with regular intervals using clear tape.Voila!!! You are now ready with the beautiful FALL Banner.Chose a right place in your house to display it and enjoy your work.


Do you like this Chalkboard banner ??What do you think about the reuse ?? Just erase this design and write your guests name in it to use as a place card for thanksgiving dinner. If you don't decorate for seasons , you can do it for birthdays in the same way using birthday cones or cakes instead of fall leaves. Share what you think of this idea in the comments below or write to vikalpah@gmail.com . I would love to hear from you.
Note : This is not a sponsored post.


.png)