Friday, February 27, 2015

How To : Corkboard to Chalkboard + Inspiration board

I have a large cork board just hanging in my craft room without much use.As I was re making my craft area I thought I can make use of the cork board effectively. I saw a random idea of converting a cork board into a chalkboard and make it a dual purpose board.I implemented that idea along with my crafty touches to make a boring cork board look WOW !! Here is how.


Materials Required :
Cork board
Spray paint of your choice
White glue
Masking tape/ Painter's tape
Chalkboard paint
Chalk
Paint pens of different colors(Optional)
Ruler and Pencil

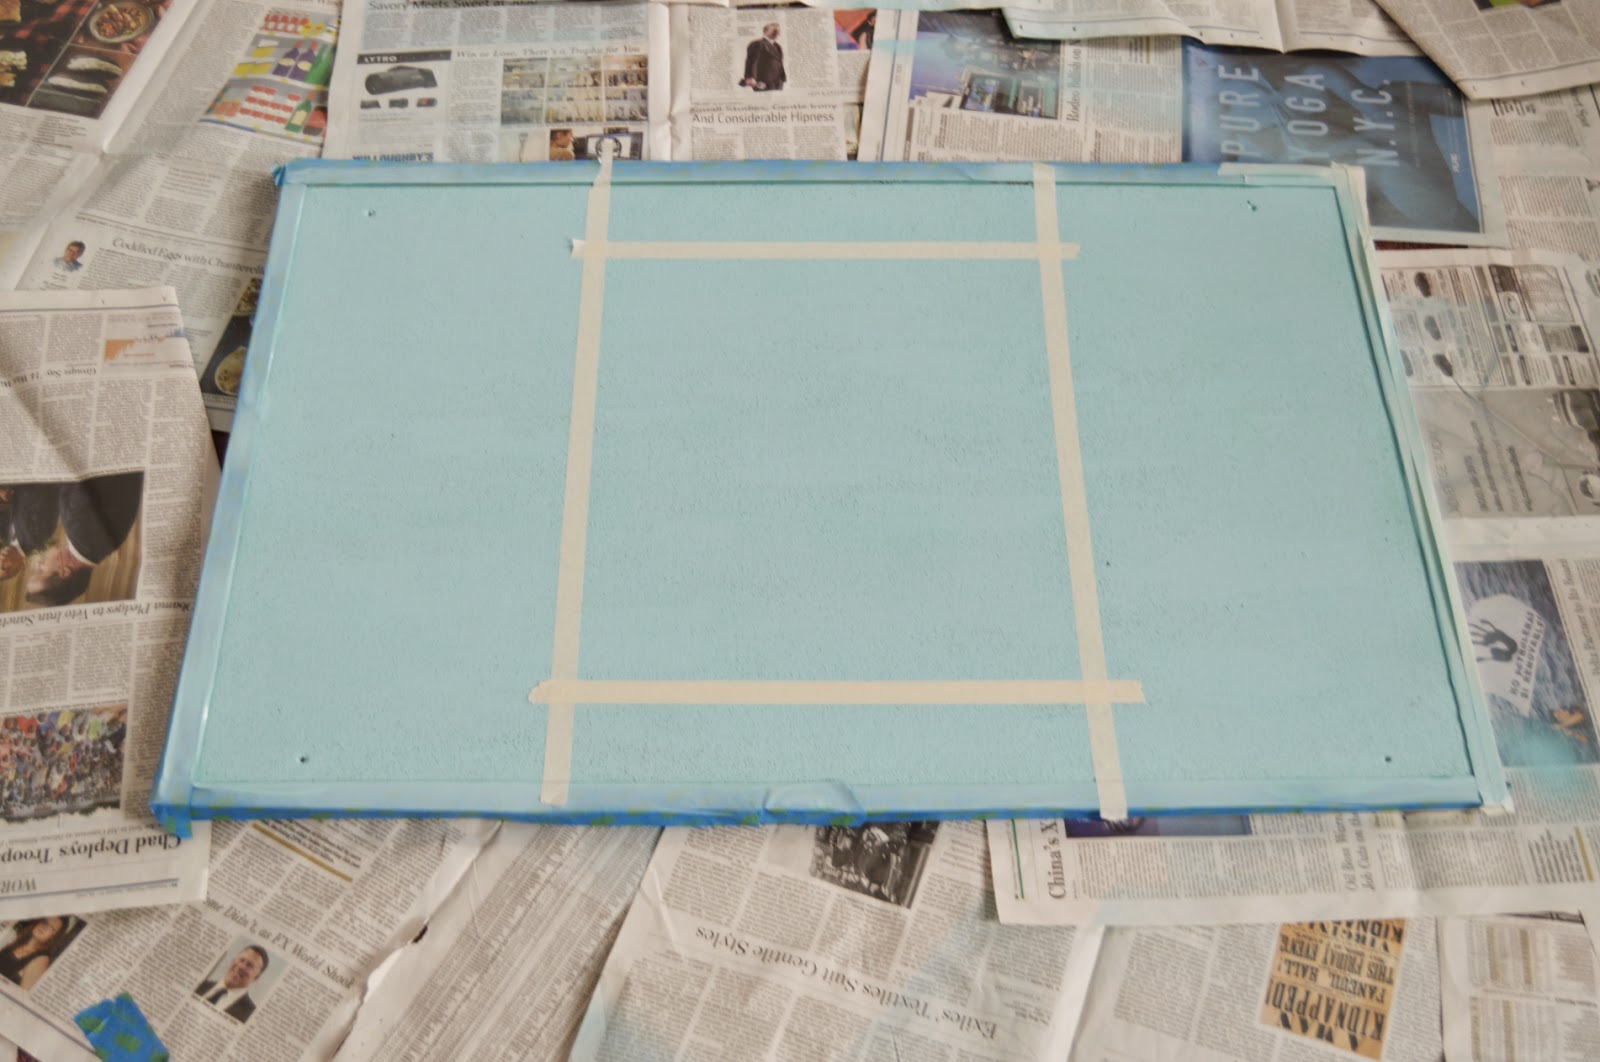
Step 1: Cover the cork board frame (If you have one) with painter's tape or masking tape and spray paint the cork board with color of your choice.I used Blue ocean breeze from krylon. 


Step 2: Decide the area you want to make the cork board as chalk board and tape it around with masking tape. I decided to go chalky in the center of the board.


Step 3: Cover the area with a coat of white glue and allow it to dry.


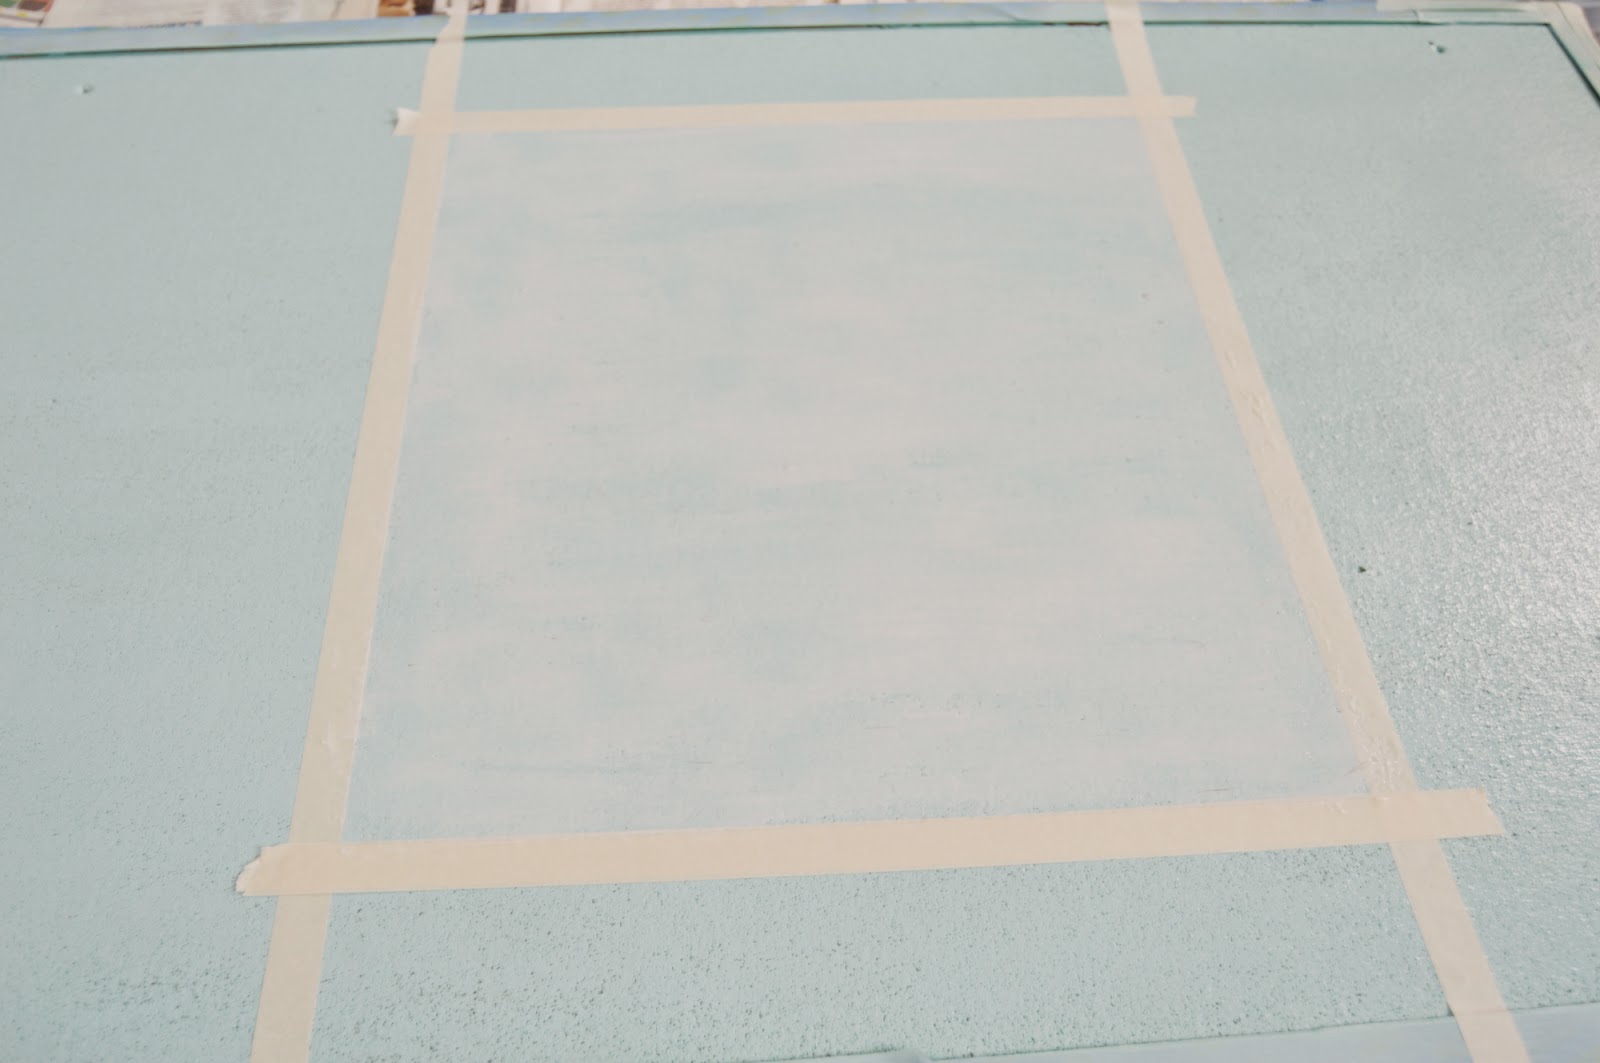
Step 4: Apply chalk board paint over the coat of glue in one direction (Either horizontally or vertically).Allow it dry and then paint in the opposite direction.Allow it to dry. (I did two coats in each direction ).Remove the masking tape.


Step 5: Allow it to cure for 24 hours  .(Refer to the back of the paint bottle).

Step 6: Season the chalk board area with a piece of chalk and wipe it clean with a tissue or towel.Your chalkboard is now ready to use. 

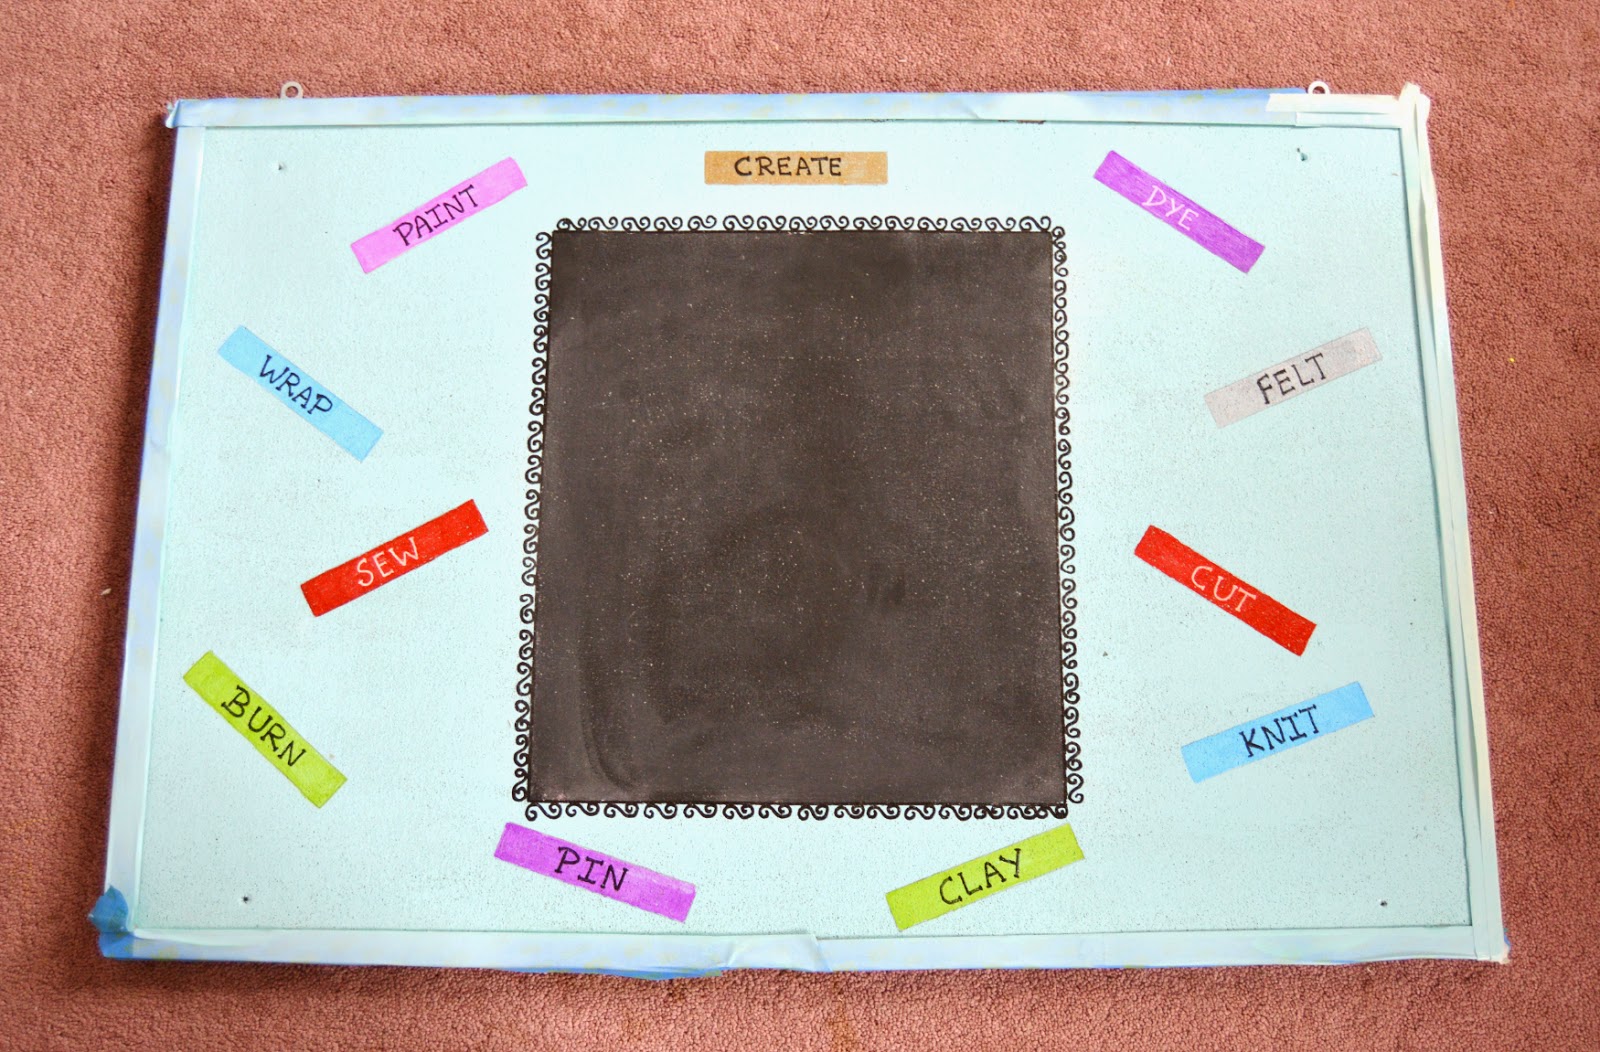
Step 7: Add a border design to the chalkboard with a paint pen. You can also fix any uneven edges and mask it with a border design but it is up to you.

Step 8: Add some geometric designs or flowers using paint pen on the sides of the chalkboard. Even though you are going to cover that area with inspirations or pictures, I thought little details here and there will add a great touch to the board itself when you did not pin anything .So, I used a pencil and ruler to draw some sprinkles kind of rectangles all over the cork board and fill it with paint using paint pens.


Step 9: Write some inspirational words to fill the shapes , As I am going to have it in my craft room, I wrote create, paint, burn, knit, clay,sew,etc. You can also fill them with inspirational words like aim, achieve,be positive,dream high,love, etc if you are using the cork board for office space. 


Step 10 : That's it ! Your board is now ready to pin your inspirations, quotes,things to check/remind, reference guides ,write to do list and the list goes on!! Here is few examples of How I use them .


This is how my craft space looks right now with the inspiration board


 How is this makeover ? Do you have an inspiration board at your work place ? Let me know in the comments below.You can check the links below to see the tutorials for the other displays near the inspiration board in the picture.


Friday, February 20, 2015

DIY Nursing Cover

Are you thinking too much on what to buy or DIY for mom-to-be friend or sister or daughter for baby shower ? Here I have an easy DIY to show how you can sew a nursing cover.I made this for my friend along with Bumble bee Camera lens buddy. I made this long back in October but I did not get the right time to share this with you people as I was loaded with holiday DIYs and this would not be apt topic to fit in so I was waiting for the holiday fever to be over and now I am sharing it .Let's move on to the sewing.


Materials Required :
Printed cotton - One yard.
Contrast color fabric to the printed one - Quarter yard
Two D rings
Boning - 16"
Sewing machine or fabric glue.
Safety pin
Iron

Measurements :  
Main piece --> 44" wide X 30" length
Small strap  --> 3" X 10"
Large strap  --> 3" X 30"
Binding strip --> 1.5" X 44" (Optional)

Preparing the straps :

Step 1: Fold the small strap piece right side facing each other and sew with 1/4" seam allowance.


Step 2: Attach a safety pin on one end of the strap and insert it inside the strap and bring it to the other side to turn the strap inside out. (You can also use thread and a long stick like bamboo skewer to do this)


Step 3 : Iron the strap and make a top stitch on both the sides with 1/8" seam allowance.

Step 4: Repeat the same steps with large strap but before doing the top stitch for large strap ,push the sides of the strap towards inside to create a inverted "V" and then make a top stitch.  This inverted "V" end is just for clean look ,if it looks intimidating you just fold it and close it as you do normally.


Step 5: Take the D rings and the small strap. Cover the D rings for about an inch or so with strap ,fold the edge of the strap and make a stitch forming a square to secure the rings in place.(To do this , Make one side of square, let the needle be inside ,lift the presser foot and turn the strap. Make the another side of square and repeat the steps to complete the square )


Make binding strip and sew it to the bottom :
This is a optional step. I thought adding a red strip of binding at the bottom will give a balanced and perfect look for the nursing cover.Because ,If I use the red fabric for the straps alone I feel some details are missing at the bottom.But it is up to your taste and preferences.

Step 1: As the red fabric is only quarter yard, Cut as many 1.5" wide pieces from the quarter yard to form a 44" length strip. Attach them together with a stitch.
Step 2: Fold 0.5" inwards on both the sides of the strips and Iron.Your binding strip is now ready


Step 3: Cover the raw edges on the bottom of the nursing cover with the binding strip and pin them in place.Sew along the binding to complete the bottom.


Attaching the straps,boning and finishing the sides.


Step 1: If you have selvage (self finished edge of the fabric) on the sides you can leave it as such or you can double fold for 0.5" and sew it to finish the sides.


Step 2: Fold 0.25" from the edge of the top part and iron and then make 1" fold  and iron.This is done to create a space for inserting the boning. Pin the folding to stay in place.


Step 3: Mark the center for the length of the boning which 16" and stitch to secure the fold only for the 16" in the center.

Step 4: Insert the boning and close the opening at the ends of the boning with a perpendicular stitch to secure the boning.


Step 5: Now it is time to attach the straps. With the wrong side of the main fabric facing up, place the small strap on the left and large strap on the right. Insert the strap into the fold and make a square stitch as you did to secure the straps with D-rings. Make a additional cross in the square for extra security. 


Step 6: Finish the remaining folding on each side to complete the nursing cover.Voila !! Nursing Cover is now ready !!!


What do you think about this nursing cover? What other gift suggestions do you have for baby shower?? Is baby shower gifts are always for baby-to-be born or for mom-to-be also?? Let me know in the comments below.

Friday, February 13, 2015

15 Valentine's day gift wrapping ideas

Just few hours more for valentine's day, A day to celebrate love. I hope you are ready with your gifts for your loved ones. I always a believe that a perfect gift wrap adds extra point for you to score(especially if you are giving to your girl friend or boy friend).So,here are few ideas for you to score.

3 great ideas to DIY your own wrap from The house that lars built


Searching for fun way to involve kids to wrap their own gifts for school parties? Tammy from Housing a forest shares great Valentine's day ideas along with the wrapping ideas

10 fun Heart Tube stamping ideas. Lots of fun Valentines Day crafts and activities.

Wrapping always need not be with paper, it can be with fabrics too.Do you know that ? Wanna get creative ,wrapping your gifts using scarf, here is a cute idea.


If you want to add a personal touch to your wrap , what will be a great way to do that other than writing a love letter or love words on the wrapping paper with your handwriting on it? Lia from Lia griffith shows "How to make your own love letter gift wrap"


Love letter gift wrap


If you want to make it more personalized ,How about adding pictures to your wrappers? Click here to see how.


Want to add a feminine touch to your gifts or want to make your own box to fit it the odd shaped gift? Marion from Made Marion shows how. 


Want to make some conversation going ? Try this idea to wrap your gifts.


Any Minecraft fans at home ? Pix Fiz gives free printable and instructions to make a mini minecraft box for treats 

Need simple idea, punch out some heart and make it a garland to wrap you gifts.Jillian used this idea for wrap her brown sugar short breads but you can use it for any gift.

1-IMG_5426


Some surprise crackers?? Yes, please! Charlotte's fancy shows how to make them with tissue paper rolls. 

Valentines cracker by Lottie Loves


An easy and inexpensive way to wrap your edible gifts, from the kitchn

111812-wrapper.jpg

It is always difficult to think about a tiny wrapping idea for those tiny little precious gift.This cross stitch match box will be absolutely perfect.Craft and creativity shows how.

Cross-stitched matchbox - by Craft & Creativity


A perfect last minute idea for wrapping your gifts .Check this hugs and kisses wrapping with tic tac toe combined.

Hope you enjoyed this 15 different wrapping ideas for valentine's day.If not valentine's day, these ideas can be easily adapted for any occasion .Get creative and give them a try .I am sure your recipient will enjoy to receive a gift wrapped differently than a normal wrapping paper.:)


Wednesday, February 11, 2015

DIY Embroidered Clay Rings

Suddenly stroke an idea, How it will be if I combined clay and embroidery?And here is the result....DIY Embroidered Clay Rings. Usually, I post on Wednesday mornings but when a sudden idea strikes on Tuesday afternoon, you need some time for making, taking pictures, editing,etc,  right? And so, later on, Wednesday night once I am done with every step of making a post, here it is for you to enjoy my DIY Embroidered clay rings. 

Simple polymer clay ring DIY


Materials Required :
Polymer clay (color of your choice) - I used premo sculpey 
Rolling pin
Needle and embroidery floss
Cookie cutters (optional)
Dottie tool (optional)
Sharpie metallic markers (optional)
Scissors
Adjustable Ring blank
E-6000 glue

Step 1: Condition and roll the clay flat using rolling pin.


Step 2: Use cookie cutter and cut a shape of your choice. You can also use a xacto knife or just roll the clay into a snake shape and form alphabets to use in the rings. The choice is yours :)


Step 3: Use needle or any pointy tool to poke holes for the stitches.Plan your design before you actual start poking holes. For example, whether you are going to do cross stitch or back stitch or spell out a word. ( I have done a sample in each to give you a idea )


The white thing is called the dottie tool which I have mentioned.


Step 4: Once done with holes, bake your clay pieces at 275 F for 30 minutes (Refer your package for timings and temperature). Use a normal copy paper below your pieces to prevent shiny spots.


Step 5: Thread the needle with two / three strands of embroidery floss and secure the ends with knot.


Step 6: Start embroidering you clay piece with the thread by starting from back to front and ending it at the back with a knot.


Optional step : You can also use metallic sharpie to add some glam to your rings.


Step 7: Apply a dab of glue in the ring blank and secure it in the center back of the clay.Allow it to dry and Voila !! Your ring is ready to wear.


How easy was that ? You can do simple as well as complex patterns using this method. The Dottie tool I used was perfect to put holes but you can also use needle to make holes. Make sure to make the holes perfect before baking for easy embroidery :). What do you think about this rings? Let me know in the comments below. If you make this rings, what design will you make ?