Friday, June 26, 2015

How to convert Duvet Cover into Back tab curtains

If you are regular reader here, you would have already read my "How to sew Tab Top curtains under $10".If not, take a look now. Like that, this is also a thrift store challenge and I got this duvet cover for $5.99 along with the large curtain that I sewed into two tab top curtains.It was one large rectangle window of 70" X 40" and this challenge is for two large 30" X 60".To be honest , when I got this particular thing I did not even know it was a duvet cover, I just randomly got this as it was large enough to make curtains.(Because I was in hurry to complete my thrift store shopping as my husband was interested to go to the next shop to buy some electronics for him so he was not much into this :P). After coming home , I opened the big bulky folded cloth and realized it was a duvet cover and was happy that I could make 4 curtain panels for 2 large windows.

I removed the zippers and cut some cloth to sew back tabs all from the duvet cover and the remaining cloth I had measured 2 pieces of  68" X 76 ".I cut that into half ,so I had 4 pieces of 34" X 76" panels plus 5" X 76" of fabric for sewing tabs.Now lets see how to sew the back tab curtains.


Materials Required :
A duvet cover
Matching thread


Step 1: Take the extra one 5" X 76" piece of fabric . Fold the piece around 1.75" on each side and iron. Fold that piece into half and sew along the edge with 1/8" of seam allowance and also sew a stitch on the other side.


Step 2: Cut the sewn long strip into 2.5" pieces for tabs.You will need 20 tabs in total for all the 4 curtains panels(Which is 5 tabs for each panel)


Step 3: Take a 34" X 76" panel and fold and iron 0.5" inch on the top. Fold, iron and sew the sides of the panel.


Step 4: Fold 1" inch from the top, Iron and place the five tabs (cut in step 2) in equal intervals and pin it with the folded top part and sew.


Step 5: Now fold each tab for 0.5" and pin it. Sew and secure the tab. That is it. The top part is done.


Step 6: Fold and Iron 0.5" and then 3" for the bottom hem and sew. Tada! Your first panel is ready. In the same way, sew all the four panels and your curtain is now ready to hang for two large windows. Simple, right?


What do you think of these curtains?? Have you done any DIY curtains before?? If so, share them in the comments below.Isn't it a great deal for $6 ??As always, I will be happy to hear from you in the comments below.

Wednesday, June 24, 2015

30th birthday-old is gold themed birthday party// Party planning and essentials with Paperless Post

It's officially summer now !!We can go out and enjoy the sun, for which we have been waiting for months ;) Hurray !!Also some outdoor parties !! Of course, right?? In our friend's circle, usually it will be getting together and potluck with friends rather than a single family throwing a party because we don't want to burden anyone (We are good people, you know !! :P). Among our friends, we usually get together for birthdays and anniversaries. When more than one person's birthday comes close to two weeks or so, we celebrate their birthdays together in a weekend between their birthdays.In that fashion, July is the month which has four birthdays which comes very close to each other, my husband and my very close friend's birthday falls on July 8th, my friend's son on 14th and another friend's on July 18th .Among these four , two of them is celebrating a milestone(30th) birthday this time. So, this time I thought I will plan a theme based party.

When Paperless post approached me to do a inspiration board for any kind of summer party,I thought why not create a inspiration board for the 30th birthday party that I am planning on.So, I came up with the theme "Old is Gold". I named this party theme as "old is gold" for two reasons:

 1) Having reached "30"years is something to cherish and not something to feel about because nobody can stop us from growing old,so there is no point in worrying.What say? That is how I came up with the theme being old is golden and valuable.

 2) The moment I wanted to plan a theme party I wanted to go with black ,white and gold colors because those are some of my favorite colors.Also Black and white represents "Retro", "Old" so I thought "Old is gold" will be a perfect name for this party.Got it ??

Now to the Inspiration board.


So, you got the idea?? Let me explain , a little more in detail. I have mostly shown the decor part in the inspiration board(above) as we are planning to order the main course of food outside and have decided to prepare appetizers ,cake and desserts by ourselves.(But still not decided with the complete meal plan) So, Lets talk decor now.

1) Balloons: I love the how the gold leaf is painted on the edges of the balloons. It will also look great on the black balloons too. So mixture of black and white balloons with the gold leaf bottom would look amazing ,Isn't it? And I also have decided to write the names of all the birthday buddies in the black balloons like how "Glitter,Sparkle, twinkle,shine" is written. Along with balloons I would also like to add number "30" gold balloons.  

2) Party crown instead of Party hats : To make something different than usual , I thought this party crown will be great. And also to make the birthday buddies special , How about a personalized one?. Cut a black cardstock in the shape of the inverted "V" to match each inverted  "V" in the crown and spell the each letter of their name in the crown. Black background with chalkboard font(If you can design and print) or black cardstock with white marker will  also be great for this simple crown DIY. 

3) Banners : There are lot of ideas when it comes to banners, you can get plenty of printables on pinterest or if you want to keep it simple, get a circular punch and a bunch of black, white and gold cardstock.Punch circles and stitch them  or if you don't have a sewing machine, a long thread and clear tape will work just fine. 

4) Candles: Candles are so inviting and adds a pleasant touch to the decor.How about painting some rocks golden and arranging them on the black plate? Also, I have pinned some gorgeous tea light candle holder DIY to my pinterest .

5) Serving Tray & bowl : You can make little modification to the tray's you already own with simple DIY. Add a black and white striped cardstock in the middle and add gold paint to edges to match the theme. If you want any bowl to hold candies or flatware such as spoons, forks,etc try this DIY air dry clay jewelry dish. I made it as jewelry dish but you can make it more deep to hold items for the party.


6) Plates,cups and spoons : There are a lot of black and white plates as well as gold plates, you can chose whichever you like or based on the table cover you are using. I would say If you are using black and white cover go with gold plates or vice versa. Same with spoons and cups too. If you can't source for striped cups , get plain white cups and some black tape and DIY :)

7) Cakes and cup cakes : We are planning to bake our own cake and I will let you know how it turned out in my Instagram account.May be a Shorter version of the one shown in inspiration board. You can use edible glitter or edible glaze to add gold effects to desserts and the cake.We have not decided much on our meal plan as said earlier but if you want more ideas of meals and snacks, I have pinned few recipes to my "old is gold 30th birthday party ideas" board, check it out. 

8) Art or quotes display : If you want to display any artwork or quotes that supports the theme, I have designed a keep calm poster for you.If you want, you can download it for free.


I think I have given almost all the ideas I can. As I am a DIY person , I have included my DIY version on each items. To find the original sources of each DIY I have mentioned above, check my "old is gold- 30th birthday party ideas" board. Also , I will update this post with photos of how my decor inspirations turned out. We usual invite everyone for the party through Whatsapp group and a phone call as we all are near by and always it is only limited people.But if you are planning for a big party or wedding in the same theme, do check out some awesome invitations by Paperless post. They have both e-invites and paper invites.

If you are planning a party on a budget, don't forget to check out dollar stores for party supplies and cool decor items in thrift store which you can give a quick makeover. Hope you enjoyed this theme of "Old is Gold" 30th birthday inspiration and ideas. Have you thrown any themed parties?? If so, share your experience with us in the comments below. As always we will be happy to hear from you :)

Disclaimer: This is not a sponsored post. All the opinions mentioned in this post are from yours truly crafty brain.

Updated on 7/13/15 : As mentioned above, few pictures of DIYs and supplies inspired by "old is gold" theme for birthday party.

Birthday banner : I made a black and gold birthday banner for only 75 cents(I had all the others supplies in hand). Nothing fancy , it is simple that anyone can do with minimal supplies at home. Here is how.
Materials Required :
3 (12" X 12")black cardstock 
Ruler and pencil
Gold & Silver markers
Scissors
Paper cutter (Optional)
Hole punch
Rope for tying the banner

Step 1: Cut one inch from any one side of 12" X 12" cardstock ,now you have 11" X 12". Divide them into 6 such that each part has 5.5" height and 6" width. Do the same for all the three cardstock.I cut 13 pieces to spell "Happy Birthday" but you can add more if you are spelling out the name of the birthday girl/boy.


Step 2: Mark 2"X1" with a pencil and join lines from the point to the corners at the bottom to form a inverted "V" and cut it with scissors.Repeat the same for all the pieces. Punch holes at the top of each piece of cardstock to hang them. Write the letters using gold marker and add dotted lines for decoration using silver marker. String them in order on to the rope to hang them .Voila !! Quick and easy birthday banner is ready to grace the occasion :)


Gold bowl as holder for spoons,forks & knives : I had an extra bowl after these makeover that I got in flea market, painted them gold to hold spoons, forks and knives.


And the plates,napkins, cups...


Finally the cake.
I tried making a fondant cake for the first time(you know me right??I love experimenting new techniques) and it turned out as "Not so great cake" according to me. Taste of the fondant was dry and I felt it did not go well with the cake. I should say my friends were so nice to say the cake was good.(Sorry dears, a good cake next time for sure :)).  


Friday, June 19, 2015

DIY Luggage Tag using duct tape

When purchasing a big suitcase, I had thought mine should be a rare color out of those common black and red suitcases so that I can spot my suitcase easily during baggage claim.So I chose for violet one(2 and half years back) but nowadays I tend to see a lot of violet color suitcases :((I think most of the people started thinking like me :P).So, I decided to add bright luggage tag to identify my suitcases easily.If you are in the same situation as mine ,stick around to learn how to make your own luggage tag using duct tape.


Materials Required:
Duct tape in your desired pattern and a contrasting color duct tape 
Utility Knife
Clear plastic or shipping tape
Cutting mat
Sticky back Velcro

Step 1: Making of duct tape fabric

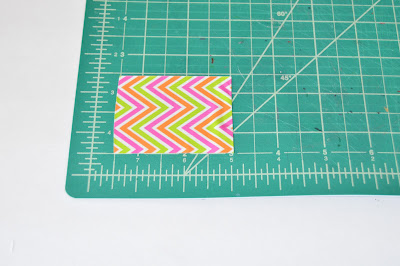
Take two strips of duct tape about 8" each. Place the sticky sides together to form duct tape fabric.Fold it into half for the luggage tag.


Step 2: Making of closure

Take a 3" inch duct tape.

Cut a half inch square on both the ends of one side of the tape.


Fold the tape one above the other to form the flap.


Use the sticky area to attach the flap to the one end of 8" inch duct tape fabric which you made in the previous step.Shape the edge as desired.


Attach one side(hook side) of the velcro to the inner side of the flap and stick the other side(loop side) of the velcro on the back of the 8" duct tape fabric at the appropriate position.


Step 3: Add clear plastic for inserting address label

Cut clear plastic (or fold a piece of shipping tape to the required size) with 3.75" length and 2" width. Add an half inch duct tape on all the corners . Fold the duct tape on to the inner side on the top alone. Place the clear plastic on the inside of duct tape fabric and fold the remaining tape to secure the clear plastic on to the duct tape fabric.You can now write your address and phone to contact you in case of any emergency like baggage delay ,etc.And also if you are making a round trip ,write the "To" on one side and "From" address on other side and switch it up while returning back.(Does it make sense ??)


Step 4: Cover the front

Take a contrast color duct tape about 4" inch and trim the corners for 0.25" inch and paste the tape on to the front of the luggage tag. Add any sticker or decoration to the front of the luggage tag


Step 5: Take a long strip for attaching the luggage tag to the suitcase

Take 10" of duct tape and fold both the sides overlapping one above the other to form a long strip.Make a slit at the top to insert the strip(If you want double the strength ,add a extra bit of duct tape inside and out before making the slit).Insert the strip to the luggage .Overlap and secure the strip to the luggage with a piece of tape. Tada!! Your luggage tag is now ready.


So, How easy was that ?? I don't want the address to show out so I made it this way but if you don't want to include the address label or you don't want to add a closure, you can cut the duct tape length in the step 1 as 4" instead 8". Also you can use any material like a cardstock and ribbon to make this tag instead duct tape.What are you waiting for ?? Take your xacto knife and start crafting!! 

Friday, June 12, 2015

How to sew Mini Dora bag for toddlers

Before I went for vacation in May, we visited my cousin sister's place in Boston. She has a 7 seven years old son and almost 3 years old daughter. Usually I get some toys or make some toys to gift them while I visit them .This time I called my sister to ask what are their current favorite cartoons so that I can buy toys of their favorite characters. It was "Dora" for my niece. We went to "Toys'R'us" to get toys but surprisingly there were only two or three items out of which one was a "Dora doll" and others were small place things which is for age group of 3+. So ,we got a doll along with another toy but I was not very satisfied. We had the trip planned for weekend and we visited the shop on thursday before that weekend.Suddenly on friday afternoon when I was packing for the trip, I thought I could make her a small dora bag if I had enough dora print fabric. I started digging through my fabric collection and found I had bits and pieces of Dora print fabric from DIY No sew shape pillows. My plan was to make a small bag and I did not had enough time to look for inspiration or find a tutorial.So , I made a small square of 5"X 5" and developed my own pattern.If you get to this situation in future ,remember this bag tutorial and I will show you how to make.


Materials required: 
7"X 10" cotton fabric with "Dora" print
7"X 10" solid cotton for lining
2"X 25" for bag handle of any color (preferably dora print)
Interfacing
Marking chalk
Magnetic clasps button for bags - 1
Fabric scissors
Iron
Sewing machine
Matching thread
Paper ,ruler and pencil for making pattern
Hand sewing needle


Step 1: Draw a 5" square.Round the corners.Make a 2" line from the center and draw a semi circle connecting the edges of the square for the purse flap.Cut into half for the pattern.(The blue paper shown in the above picture is the pattern for the mini bag.)

Step 2: Use the pattern and cut the fabric pieces with 0.25" seam allowance. Two fabric pieces for back with flap part(One with Dora print and one lining piece) .Fold the flap or cut the pattern and trace the remaining for front piece.Cut two pieces for front(One with Dora print and one lining piece). Also cut the interfacing for both the front and the back. Cut 2" X 25" for handle from "Dora" print if you have or use the lining fabric color.

Step 3: Iron the interfacing of front and back piece on to the Dora print fabric. Take a small square piece of interfacing and iron it on to the back side of flap to attach the magnetic button. Make two small slit in the area of interfacing to attach the buttons.Use the button to mark the distance between the two slits. Insert the button into the slit and put the metal piece .Use the edge of the scissors to secure the metal part of the button as shown. Repeat the same procedure for attaching the another part of the button to the front piece of the bag.


Step 4: With right sides of the back pieces facing each other, sew along the edge with 1/8" of seam allowance leaving small gap. Use the gap to turn the fabric inside out ,iron the piece and sew the gap. Repeat the same procedure for the front pieces. (Usually the flap of the back piece and the front hem is alone sewn and turned inside out but I felt to sew the whole piece as kids are handling the bag .I don't want fraying edges inside the bag.But it is up to you :)).


Step 5: Now with right sides of front and back pieces facing each other ,sew along the edge with 1/8" seam allowance and turn inside out.Iron the purse.Yes!! I said purse as we did not attach the handle yet. If you want to leave it at this point , then you will have a mini Dora purse :). Still a few more steps to the bag.


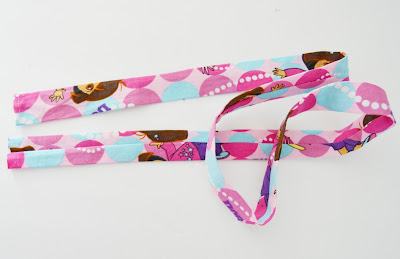
Step 6: Fold 2"X 25" fabric into half lengthwise and sew along the edge with 1/4" seam allowance. Before this ,if the edges of the fabric handle piece is fraying , fold and sew. Turn the handle piece inside out and iron with the seam in the middle. Add a zig zag stitch in the middle for decoration. Hand sew the handle with back stitch to the purse.Voila !! Your mini Dora bag is ready for the exploration!!!


My niece was very happy with the bag that she even slept with it on her that night. She did not wanted to remove and also give her bag to anyone. My sister was saying it was tough for her to make her forget the bag.I was so happy to hear that from her. This is why I always prefer handmade gifts to store bought ones.What do you say ?? I hope you enjoyed the making of the mini bag and I am sure it will help you someday. Don't worry if you don't have a sewing machine, you can hand sew this bag or use fabric glue to make this. Let me know what you think in the comments below. As always I will be happy to hear from you.