Wednesday, July 30, 2014

DIY Thumb tack wall art

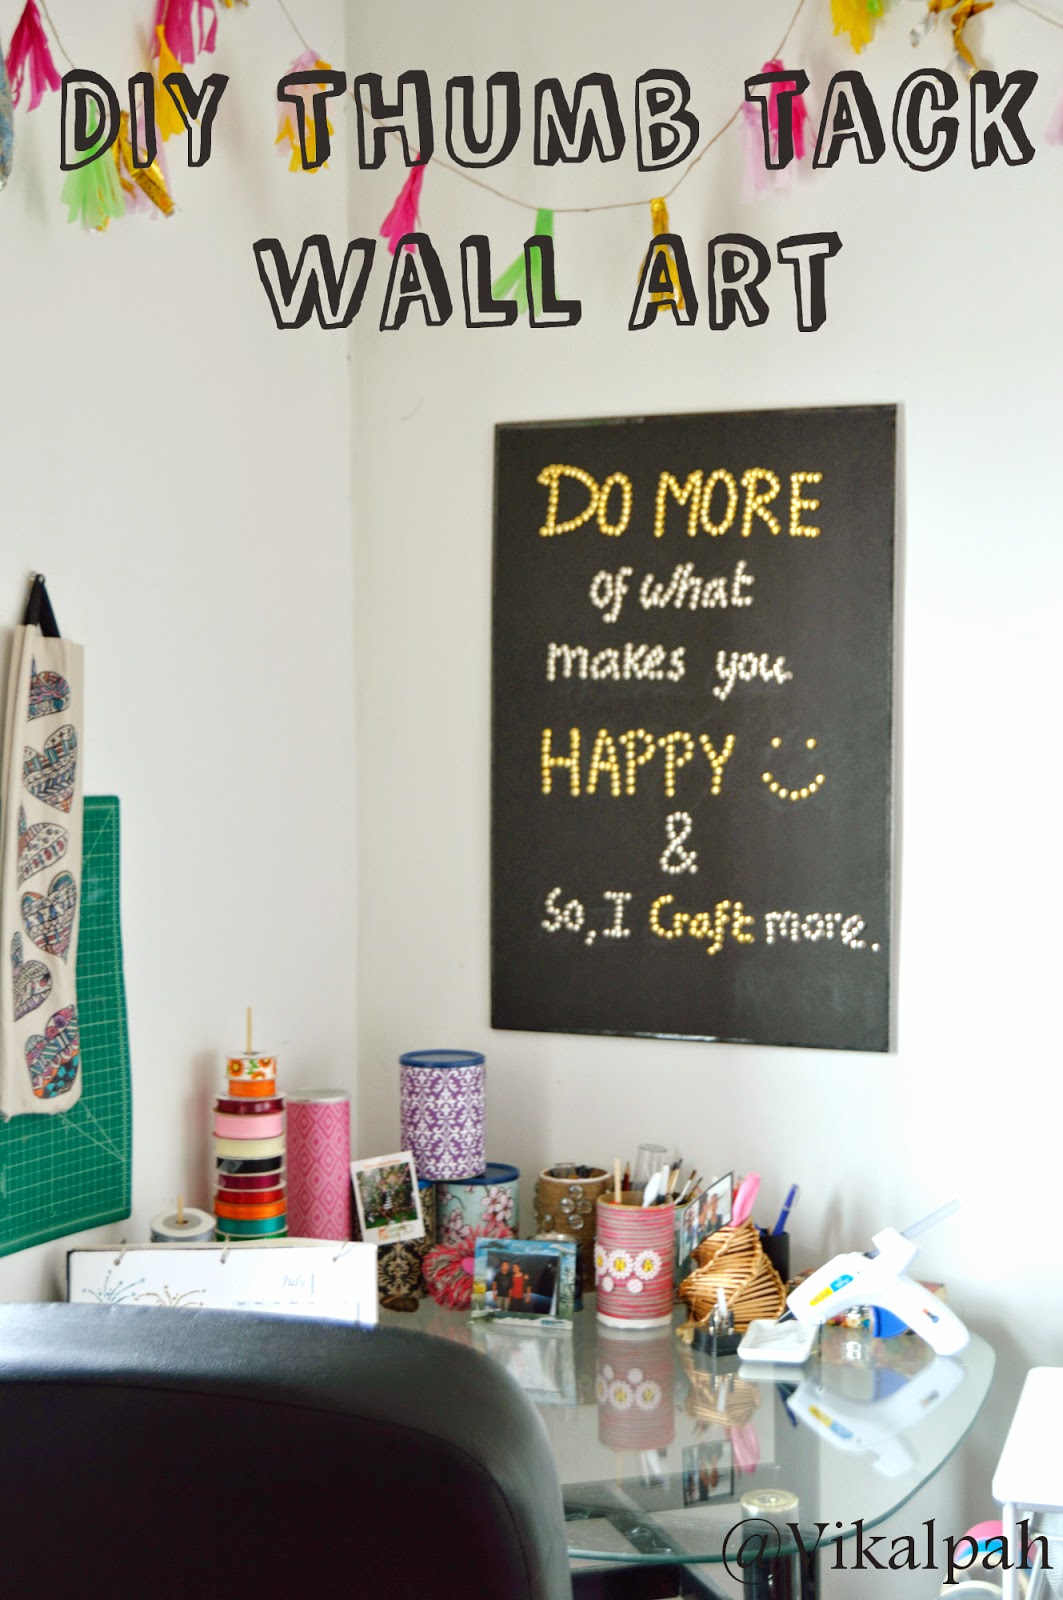
Have some empty walls ??Searching for a budget friendly posters or wall hanging to spice up the wall?? Here is one such idea which you can absolutely DIY all by yourself.Things you need is already in your supply stash or you can get everything in dollar stores for just $4.Here is how the final result looks like.I think it is perfect above my craft table.What do you feel?


If you already have a favourite quote ,then you are all set to get started .Or if you want to select that one favourite from many of the favourites that you have in your pinterest board, then take sometime.
As I belong to the later category,I was just going through the pins and found the below one perfectly suits me.

I added a extra line to suit my craft room.If you want some inspiration,here is the link to my pinterest quotes board ,click here.

Materials Required:
2 black foam board
Gold & silver thumb tack --> one box each
White pencil or crayon
Clear transparent tape

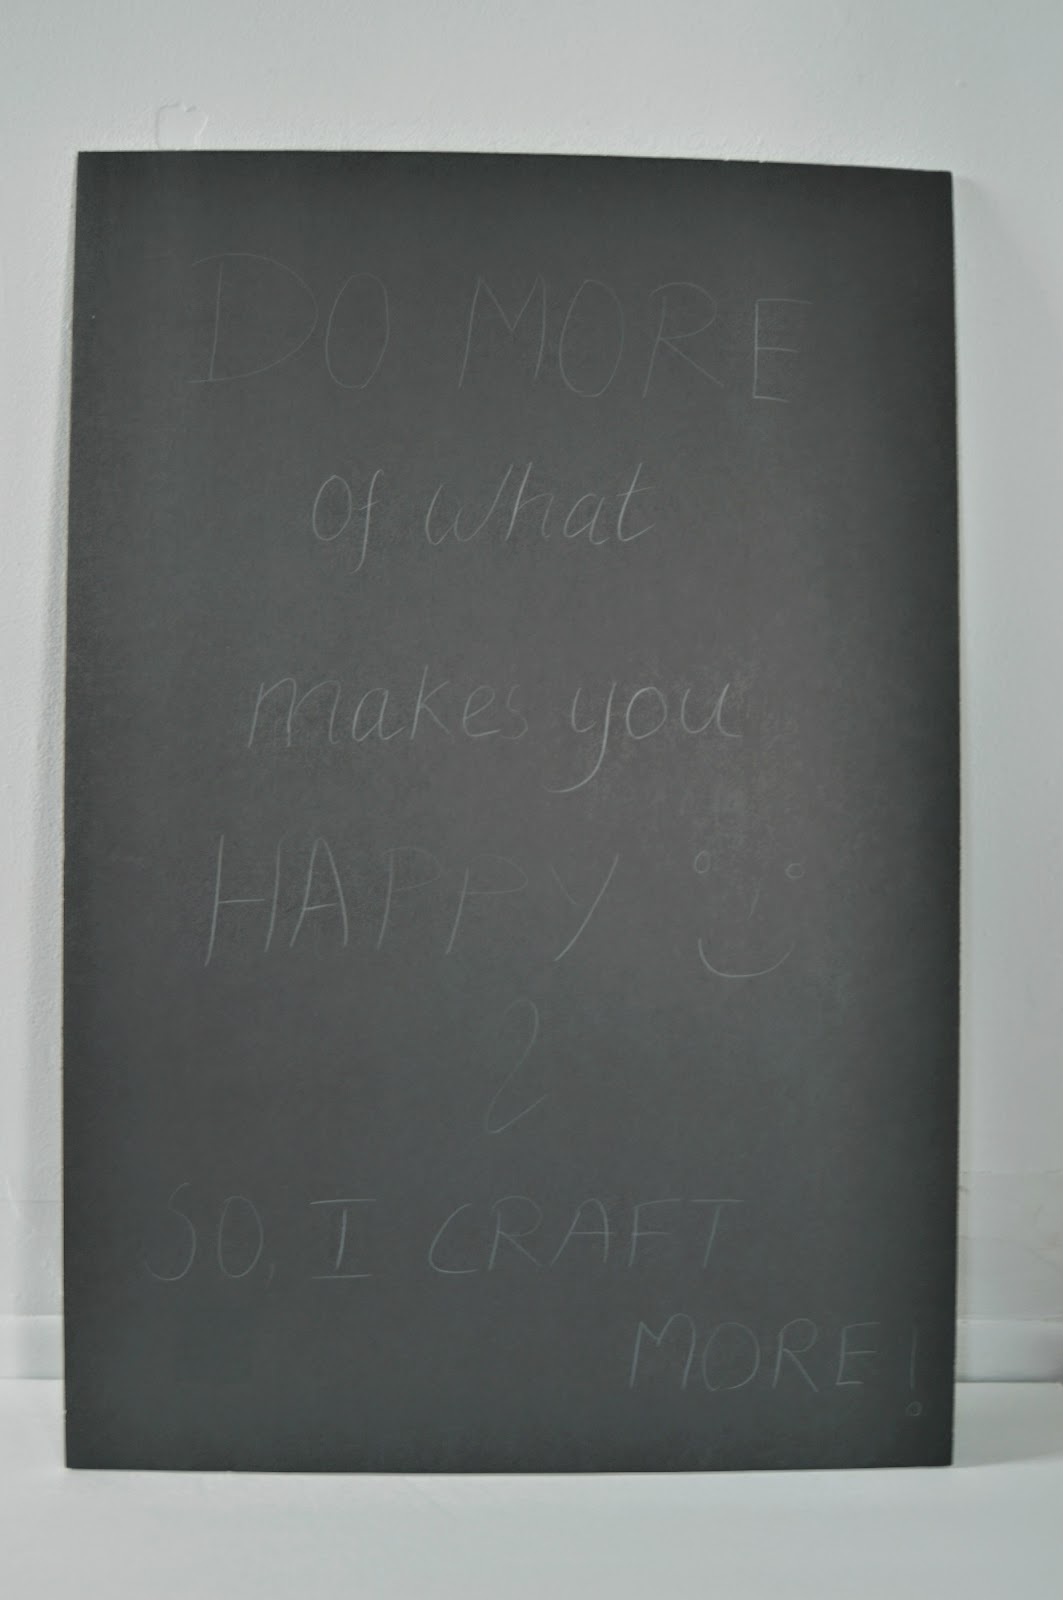
Step 1: Stick the two foam boards using glue or clear transparent tape in the corners.Write the quote on the foam board with white pencil.


Step 2: Start pinning the thumb tack with the white pencil lines as guide.I used silver and gold thumb tacks alternatively just to add some more detail.But , you can use single color.But make sure you have 2 full box of thumb tacks in hand before you start. Voila!!Now you have your own quote wall art to hang in your room!!


To hang it in the wall ,I used sticky back velcro.You can also use mounting tape or use thumb tack as I used to hang this wall art.(Refer Step 4).


Have you ever made your own wall art ?What do you think about this quote wall art ??Do you like to post some positive quotes around your room to keep you motivated ??If so, share with me in the comments below.


Friday, July 25, 2014

DIY Apron from Men's Shirt

I made this Apron when I went to India for vacation.I have my babe(My sewing machine) in my home.As it has been many days since I used it , I planned to use it when I went there for vacation .So, I took a old shirt of my hubby with me to make this Apron.There are different ways how you can make a apron from men's shirt.The shirt which I used has worn out collar so I used this method to make a apron.Now lets move on to the making.


Materials Required:
Old shirt
Sewing machine or Fabric glue for no sew version
Extra scrap fabric or adding trims(Optional)
Fabric markers(Optional)

Step 1: Mark the areas you want to cut for the main portion of the apron. I used the back portion of the shirt for apron.Draw two curves on either side near the armhole area.Cut the fabric leaving some extra inches on all the sides to fold and stitch or to fold and glue.


Step 2:Finish the side seams
Finish the sides by folding the edges inwards and making a stitch.

Step 3:Making long ropes
Cut some strips of fabric from sleeve area or the front portion with the width of 2 inch and make a long rope (Attach the pieces together to make it long) for the neck and for tying the apron in the back.To make this, fold the strips half an inch inward on both the sides and fold it again and stitch.

Step 4:Cover the armhole area with binding strips
For the armhole area(I mean the curves),Cut an 2 inch width of fabric from the sleeve area to cover the edges of the armhole area and top of the apron.Use these strips as a binding strips.You can also get a binding strip which are readily available in the store.Make a half inch fold on both the sides and iron(Picture 1).Cover the edges with the strips(Picture 2) and make a stitch.


If you are using fabric glue ,you can still do the same step with the glue instead of stitch.


Step 5: Make a pleated trim and attach it to the top portion
This is a optional step.I felt adding a detail with contrasting would be interesting.So, I decided to add a pleated trim to the top portion of the apron.If you want to add a pleated trim, you need thrice the length of fabric to the area, you want to cover with the trim and width can be according to your choice.I measured 2.5 inch width for my pleated trim.
Measurement for the trim = 3 X ( length of the area you want to cover with the trim)

For example : The top portion of apron measures 11" and so I took the fabric for 33" length to cover that 11" portion with the pleated trim.

It is always good to measure some inches extra for safer side. :)Before making the pleats fold and stitch the hem portion of the trim.

Mark 1 inch width with the marker covering the whole length.To make it easier for you, I have numbered the markings as 1,2,3 and so on.To make one pleat , you need 3 widths.Pinch the fabric in marking 1 and join it with the marking 3 so that it forms a reverse "S" shape.Repeat the same step with next 3 widths (4,5,6) to form the next pleat.Secure it with pins and stitch.


Attach the trim to the top portion and cover it with the binding strips.


Step 6: Attach the neck rope
Measure the neck portion and cut the long rope(Which you already made in step 3) to suit your length.Attach them to the corners of the top portion.If you are sewing ,make sure you use two to three zigzag or reverse stitches to secure it.

Step 7: Attach the ropes to the sides
Measure the long rope and cut them into two equal length so that it can be attached to each side of the apron .Attach the rope where the side seam and armhole area meets on each side.This rope is used to tie a knot at the back to secure the apron.Voila!!you are almost done!!

Step 8: Attach the pocket
Cut a piece for a pocket and fold the edges and stitch it to the center bottom of the apron.Again this is a optional step.I used the area with buttons in the front portion of the shirt for pocket .Thats it !!! Now you are all set to rock your kitchen with your newly stitched apron.

I added some vegetables with the fabric markers as I felt the area was too empty.
I have used a different fabric to show you the process as I did not take camera with me and also there was no good light inside my house to capture it with my mobile.So forgive me for that.Please feel free to ask any doubts in the process of making this apron.

So what do you think about turning men's shirt into apron?? Have you done any "This to That" kind of projects before?? Share them in the comments below.

Wednesday, July 23, 2014

Let's talk about Glue -Types of Glue and its crafty uses

There are various types of glue available for specific purposes in the market.I also have certain variety of glues that I use for specific purposes.Its been almost one and half years since I came to United States.One fine day when I was thinking, "How I have improved myself and what knowledge I have gained over the year?" .I started making a list of Sahana(That is my name, if you are wondering!!) Before one and half years and now.The list was going on and on.So I thought I can make a "Let's talk" series about the different variety of things like glue,paper,scissors,paint,etc that are used by crafters.
When I was in India ,I did not have much time to explore about the items available as I was working and I also never ever thought there would be these many glues in the market. All I know about glue is Fevicol (It is a PVA glue ) and Fevi kwik (It is a CA glue).I use Fevicol for almost every crafty things I make and If I need some strong glue than Fevicol like sticking some broken piece of glass or plastic I will use Fevi Kwik.
But that is not the case anymore,let's talk about the types of glue that I am using now and also some more.I will link some of the projects in which I have used it.
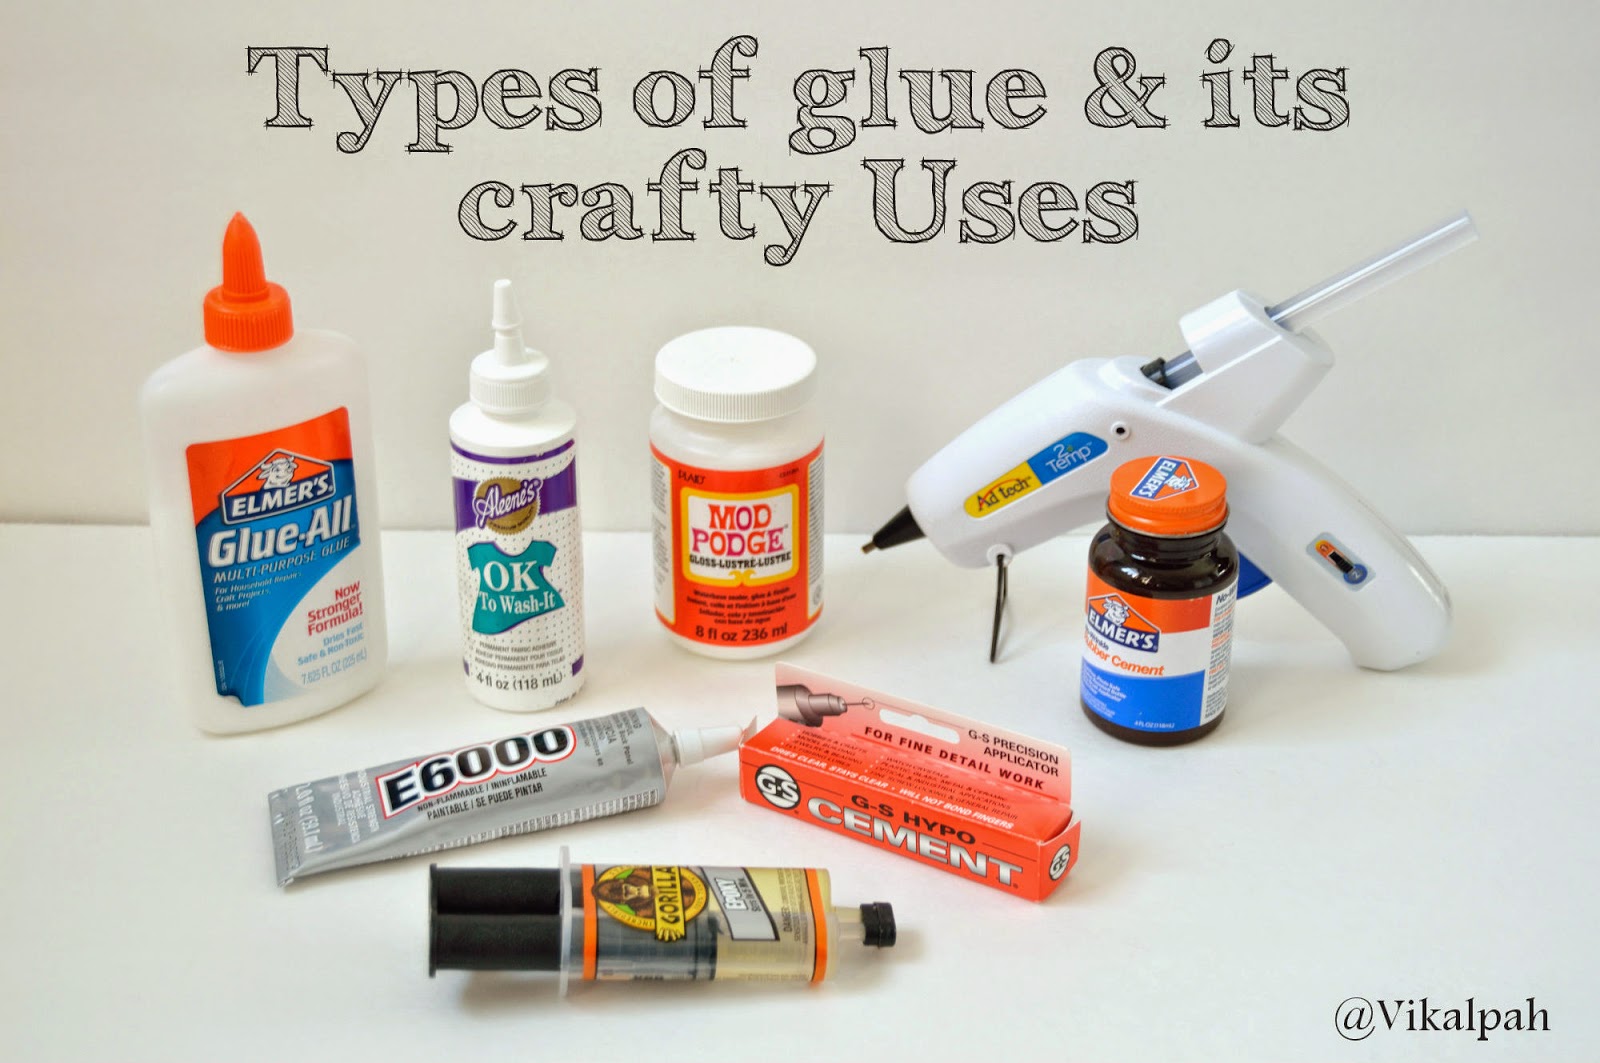
This is my glue collection :)


Elmer's Multi purpose Glue :
I use this glue mostly for paper crafts like making flowers with paper ,pen holder with magazine papers, etc
Project I used : Pen holder with Magazine papers

Elmer's Rubber Cement :
I got to know about Rubber Cement when I was searching an alternative to the permanent glue runner to use in card making. I don't feel like using elmer's white glue here as it will create wrinkles.To avoid that ,I have to replace it with the glue runner. I felt it is little expensive as I have to make many cards , so replaced it with the Rubber cement.
Project I used : Personalized new year pop up card --> I used rubber cement to glue the inside card stock to the outside card stock.(Step 3).

Mod Podge :
Recently, this is my go-to glue for making upcycle or makeover projects.Although it comes in various finishes for various objects .I mostly use the common one with the gloss finish.
Project I used :Notebook Makeover

Super Glue :
It is also called as Cyanoacrylate glue .I use super glue mostly in my clay projects. It is a very strong glue which helps to hold the findings in place. It is not advisable to use it paper and many other areas. You should also be careful while using it as the glue may damage your hands.It doesn't washes off easily as PVA white glue.It is not recommended for kids.

They come in many forms which are at times confusing . I personally prefer liquid  form compared to gel form.I used this glue to attach fridge magnets to clay projects , to insert eye pins for pendants and key chains in jewelry making.

Projects I used: Personalized Mickey Minnie Fridge Magnets
                          Christmas Special Polymer Clay Fridge Magnets
                          Customized Polymer Clay Jewelry

G S Hypo cement :
This is a perfect glue for applying embellishments to the projects and also in jewelry making. This is not a cyanoacrylate glue.It comes with a applicator which is very helpful for securing knots in the elastic bracelets and also for applying rhinestones .
Project I used :DIY Jeweled Shell


Fabric Glue :
I use Aleene's Ok to wash it fabric glue. It is perfect for someone who doesn't have sewing machine but loves to do fabric projects. It creates a strong bond but howeverI have not tested the qualities of it after washing.
Projecst I used :DIY Travel Kit
                         NO sew shape pillows

Hot glue gun : 
Even though you don't have any of the glue above, I am sure you will have this. This comes in handy for almost all the projects.I have a 2 temperature glue gun which helps me to use for all kind of projects from paper to glass.
Projects I used :DIY Flowers & Vase
                         DIY eyeglass case Makeover 
                         DIY No sew ruler cover

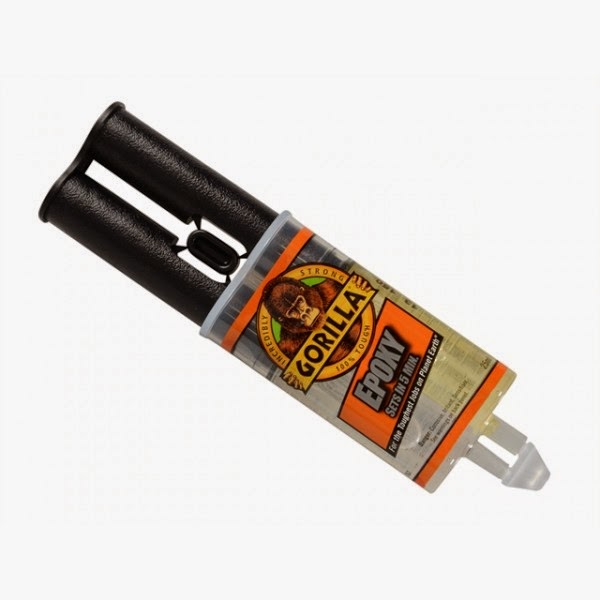
Epoxy Glue :
I got this glue to stick some embellishments on a glass.It is a two part glue ,one part is resin and another part is hardener.This is one of the toughest glue. It comes in 2 parts and has to be mixed together.The drying time for this is approx 24 hrs to 48 hrs.


E6000 : 
This is also a strong glue which can almost be used for fixing anything or creating anything.
I have not used it much but still I have it in my collection.When it comes to crafts it can be used for  attaching one object to the other and also in jewelry making. The only disadvantage of this is, the drying time is longer. It takes approx 24 hrs to 48 hrs to dry.The product says it can be used for fabric but I have not tried. Have you tried it on fabric??If so, let me your experience in the comment below.This glue also comes in clear /transparent and black colour.

Wood Glue :
I have not used this glue but I have heard people using it to make small wood projects where it helps to glue the wood together.

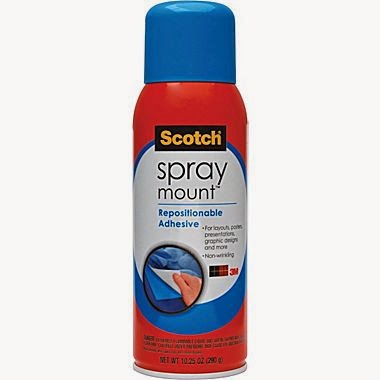
Spray Adhesive :
It is mostly used on big projects in which glue comes in spray can which can be sprayed liked paint.

Repositionable Spray Adhesive :
When you want to repeat a design using a stencil, this spray adhesive helps.For example : You want a flower design to be repeated all over a curtain or a rug or whatever, you need not buy many stencils of the same flower instead you can use this repositionable spray adhesive to do the job.

These spray adhesives are in my wishlist.Yet to be experimented. :)


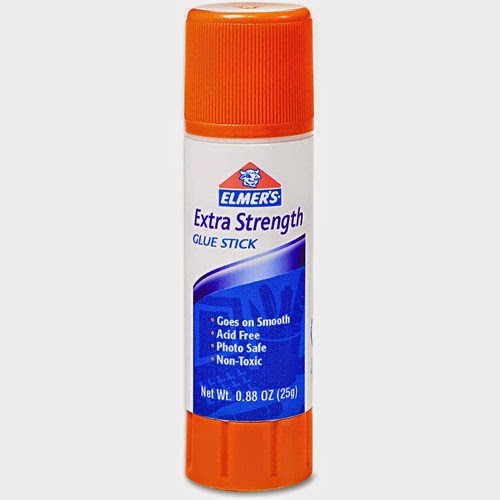
Glue sticks , Glue runner & Glue dots:
This comes handy for the paper projects like card making, attaching paper to paper ,etc.


Each one of us have different preference when it comes to glue.These are my preference of glue which I have been using for past one and half years for crafts.What glue do you use normally at your house or if you are a Crafter/DIYer what is your favourite glue ??Have you tried any glue's apart from those mentioned above??Share them in the comments below.


Friday, July 18, 2014

DIY Stained glass Candle holder

I had whole pack of gallery glass colors which my husband gave me as a gift before marriage. I don't know whether he knows what it is or not ,he just got it to impress me !!!(I think so!! :P).Let's not go deep into that discussion :) . I just wanted to use it and do some projects before all the colors gets dry.So, I came up with the idea of doing a stained glass candle holder.Here is what you will need .


Materials Required :
A Glass with wide opening.(So that the candle goes in  I got mine at dollar stores)
Gallery glass Window color (Colors of your choice)
Gallery glass Liquid leading

As I had a value paint set of 31 colors I got an applicator tool along with it which is not necessary if you get the colors separately as the bottle itself comes with the nozzle it is easy to apply with it.

Additional Bonus : You can use these colors and make your own stickers to use it on many surfaces.I have used one such in my ipad charger. I actually used these colours and filled in another sticker to use it but however you can make those kind of stickers just with these colours.Click here to see how.

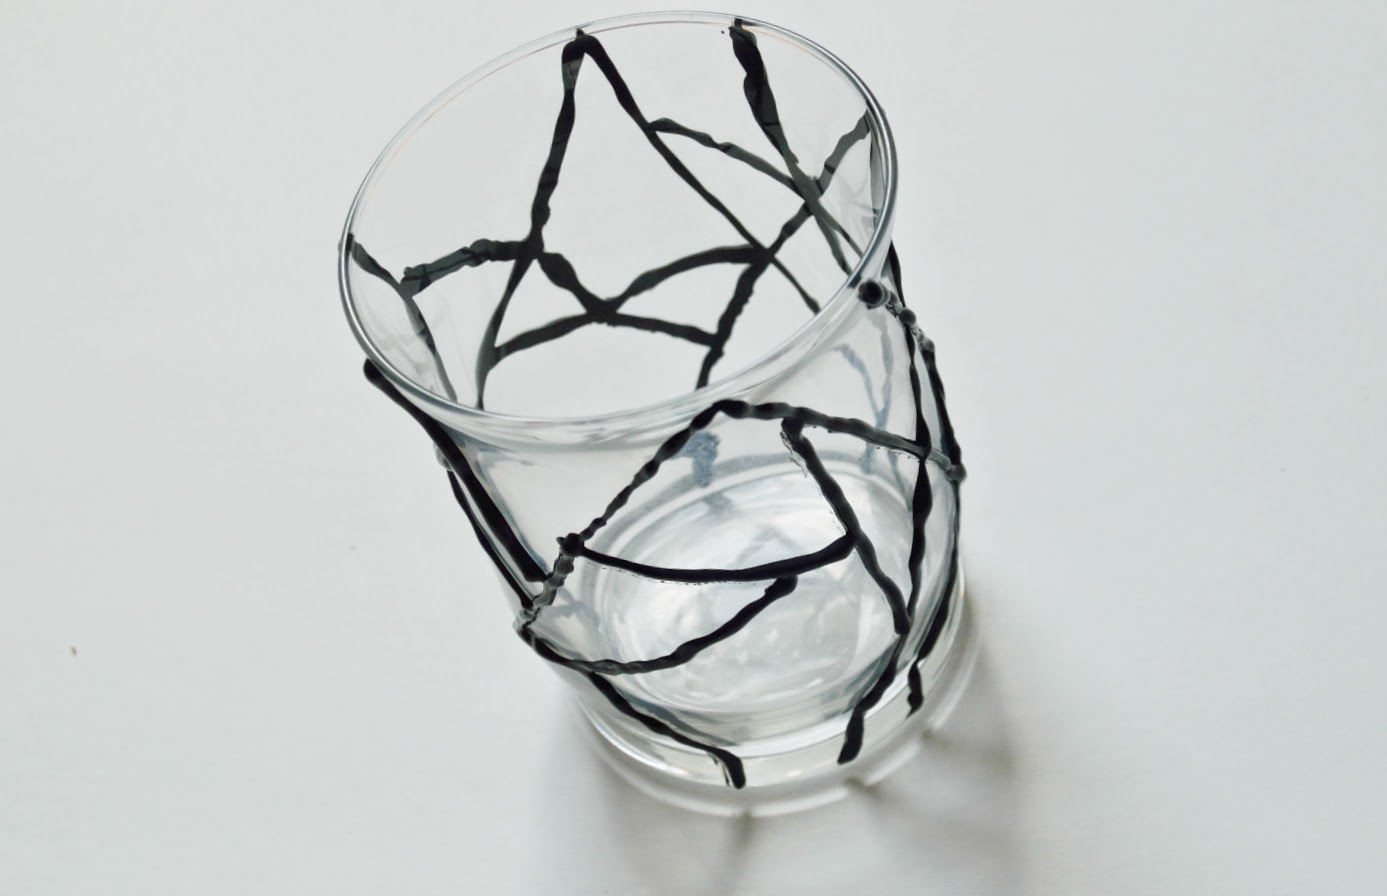
Step 1: Clean the glass and free hand the stained glass effect with gallery glass liquid leading.There is no rule or template just draw random lines to form triangles, trapeziums,etc,etc(Oops!!That is too much of geometry,to keep it simple -draw random lines so that they connect each other to look like stained glass )This forms as a thick borders and makes it easy to fill in the colors. Let it dry for 8 hours(Refer the package for instructions).


Step 2: Once it is dry start filling in the colors.I just filled random colors as I had many but you can choose a color palette or go with whatever you like.First start filling the outline and then go in zig zag manner to fill the rest. Leave it to dry as per the instructions on the package.Thats it !!! Your Stained glass Candle holder is ready !!!So simple, right??

Applicator tool that is use to apply paint.
                                     
The paint seems opaque but becomes transparent once it is dry.

Can you see the paint drying??

Completed Candle holder

During Daylight

Candle holder  with candle at night .Isn't it gorgeous??


How gorgeous is that ?? Two simple steps and you have got a Wonderful candle holder to decorate your room or your table for the next BBQ party. They look awesome both in the daylight and night.Will you make one for you ??What do you think about this candle holder ??Feel free to share your comments below or write to vikalpah@gmail.com.


Wednesday, July 16, 2014

DIY notebook makeover & How to add pen holder to notebook.

If I had known there exist a product called Mod podge and glue gun, I would have been a star in my college days with my own personalized notebooks.When I think of the notebooks we used in college days, almost half of the college has same kind of notebooks that we got from the college stores and many times by mistake we even took others notebook thinking it is ours :P(It most commonly happens when you are sharing rooms with your friends.Have you faced these kind of situations in school/college days?? )

So now, when I said I need a notebook to write my ideas for posts, my husband gave a notebook that he already has and not been used .It was plain black and I was long time thinking of doing a make over for it as I don't like to have a boring notebook like that. At last I found sometime yesterday and gave a new look to my notebook. Now it is a back to school time , so i thought this would be perfect to share at this moment.So that you need not feel like me.What are you waiting for ? Go head and start crafting new notebooks!!

P.S : You need not be a school/college going person to do this. You can even make implement this idea for your planner or idea notebook like me.


Materials required:
Scrapbook paper 12X12 -->2 sheets (This depends on your notebook size)
One plain scrapbook paper to compliment the design.
Mod podge
Foam brush
Scissors/Xacto knife

Step 1: Apply mod podge on single side of the notebook and slowly paste one of the scrap book paper above it.Let it to dry.


Step 2: Cut the excess with help of the Xacto knife.
Step 3: Cover another side of the notebook and repeat the step 1 & 3

Step 4: Cut 3 inch width of a plain paper to cover the middle.Apply mod podge in the paper and eyeball it so that it is even on both the sides and paste it.
Step 5: Once everything is completely dry.Apply mod podge over the paper to seal it and to give a shiny look on the top.Now you have a brand new personalized notebook of your choice.

Note : I used this method to cover a notebook that had a hard covering.

How to add pen holder to notebook:

When some great idea comes to mind and I take the notebook to write it ,but I never find a pen around me at that moment. It irritates and make me say like "When I need a pen I won't get it" (Meaning when I need something else I get a lot of pens :P). So I thought I can add a pen holder to the notebook to avoid some annoying situations :)!!

Materials Required :
Elastic (2 inch)
Glue gun

Step 1: Measure and cut 2 inch elastic. I used knit elastic which is available in the sewing section of the craft stores. It is available in various colours.I had white in hand so I used that. As it was plain I added some flowers using sharpie markers but this step is totally optional.


Step 2: Wrap the 2" inch elastic around the pencil and hold the remaining elastic with thumb and forefinger of right hand close to the pencil.(Picture 1)Remove the pencil and hold that part with thumb and forefinger of the left hand(Picture 2) and apply glue in the middle of the remaining part to hold it together.(Couldn't add a picture as I was holding the glue gun:()


I made the measurements with the pencil because when you do the holder for thin item you can use it for thicker items as the elastic expands and holds it in place whereas it is not possible the other way.

Step 3: Glue that to the inside of the back cover by adding some glue.Thats it !! No more worries about searching for a pen when you want to write down something at that moment.(Check whether the pen has ink !!I am not responsible for that :P)
I was little generous about glue :P You need not be !!


What do you think about this makeover ?? Have you ever done a makeover like this to suit your choice??Feel free to share your comments below or write to vikalpah@gmail.com 


Friday, July 11, 2014

DIY Travel Kit (No sew)

During summer time, vacation plans has become a default thing.When we planned one,I was in a absolute need for a travel kit to carry my toiletries .So I was searching a quick and easy idea of a DIY travel kit with some compartments as I don't like just throwing everything inside a pouch.And I came with this one and gave it a try.Today , I am sharing it with you all.Shall we start ?


Materials required :
1/4 yard of terry cloth
1/4 yard of printed cotton
Ribbon
Scissors
Fabric glue
Markers
Iron

If you have a sewing machine, you can make this just like cooking Ready to eat dishes :P.I promise it is just as easy as that.But as of now, lets talk about no sew version.

Step 1: Measure and cut the fabric.
1 piece in Terry cloth and 1 piece in printed cotton (Main piece)
Length ---> 9.5" (25 cm)
Width ----> 22"  (56 cm)
1 Piece in Terry cloth (Front piece)
Length ---> 7.5" (19 cm)
Width ---->22" (56 cm)

If you have 1/2 yard of terry cloth , you can make it as single piece, by adding both the length 17"( 44 cm).And just fold them to create compartments.(Step 3)

Step 2: Fold the hem of the front piece(0.5") and Iron.Apply glue and fold again to finish the hem.


Step 3: Divide the main piece into 4 equal divisions and mark them .Apply the glue(As shown) and place the front piece on to the main fabric to separate the divisions.Let the glue dry (Refer the package for hours to dry).You can also customize the widths according to your personal preferences.May be two small compartments for combs , tooth brush instead of one big one.

This is how it looks after gluing the compartments.


Step 4: Glue all the three sides placing right side of main printed cotton and right side of main terry cloth(Compartments attached side) facing together leaving the top portion open.Let the glue dry.Snip the corners(Picture below) to avoid bulkiness at the corners.(Be careful and patient while doing it and make sure you don't cut too much and create a hole).Turn inside out.Now, finish the fourth side.Fold half an inch of both the piece inwards and iron.Apply glue and leave it to dry.

Snip the bottom corners like this to avoid bulkiness.


Step 5: Measure and cut the ribbon.The length should be as long as to tie a knot and make a bow to secure the kit.Glue the ribbon to the middle of  front side of the 1st and 2nd panel.So that, you can fold the 3rd and 4th panel to the top of 2nd panel and 1st panel to the top of folded part to close the kit and secure it with a bow. Tada!!Now you can carry your own travel kit to next vacation.

For sewers: If you are sewing do this step first.Attach the ribbon to the printed cotton main piece before you start other steps.


So more worries about spilling of your body lotion ,wet tooth brush, etc.You now have a completely washable travel kit to carry your toiletries and to save your clothes from those spilling when you packed it in a hurry to vacate the hotel room.

Oh wait !!!Excuse me !! This is completely for all travel size toiletries and not for those big 12 fl.oz bottles.So, no worries about bottles poking out.I have shown you like that to give you an idea what all fits in. You know, even my small flat iron fits in !!!

Now , I am ready for next vacation. Are you ?? What are your plans for the next vacation ??How will you carry your toiletries ??Zip lock bags?? separate pouches?? Feel free to share your comments below or write to vikalpah@gmail.com.As always I happy to hear from you.


Wednesday, July 9, 2014

DIY pretty gift boxes

The idea of making these gift boxes came to me when I was thinking "I should do something new this time for his birthday(My hubby)".He always enjoys when I do different styles of gift wrapping for our friends and so he expects something different every time when he receives a gift from me.He never accepts unwrapped gift :P.So this time I thought instead of wrapping a box and wasting a gift wrapper why not make a wrapped box so that he can reuse it for some other purpose.It is Win -win!(You can say I have 2 gifts for you :P)


Materials required :
For :Wood grain gift box
Carton box (It can be any box -any I mean from christmas light box to shipping box)
Contact paper or
Scrapbook paper
Glue
Scissors/Xacto knife
Markers
Hole punch (Optional)
Twine (Optional)
For :The pretty pink box
Acrylic paint of your colour choice.
Foam brush
Krylon gold lea pen(optional)

Wood grain gift box:
I got the idea of doing a wood grain gift box when I found my Samsung galaxy S4 mobile box while cleaning our 3 drawer cart.I thought I can do a gift box like that with the wood grain contact paper and add some personal touches to it ,so that it is perfect for men.

Step 1:Measure and cut the wood grain contact paper and cover the entire box.Trim the edges with Xacto knife for perfect shape.


Step 2: Cut a pocket shape from the scrapbook paper.I used a leather texture scrapbook paper.I thought that will  perfectly compliment with the wood grain contact paper.Use glue on the edges of the pocket and stick it to the top of the box.Draw the dotted lines to give the effect of stitches in a pocket.

Step 3: Cut a small piece of white card stock and write you message on it.Punch a hole and add a twine in it to make a gift tag.Put it inside the pocket to complete the box.Voila!!now you have a beautiful gift box which can be reused for many other purposes (May be for office supplies,USB cables,etc etc)
You can also get contact paper in many beautiful patterns which suits for girls and do similar boxes for your girl friends and sisters also.They are easily available in dollar stores.It is also used as shelf liners.


The pretty pink box :
If you don't find a pattern of your taste, just get a acrylic paint of your favourite colour and colour your box with them for 2 or 3 coats.Use a gold/silver/copper paint pen to add details to it.You can also use a contrasting colour paint to do it.(like black & white).Use a foam brush to paint the box so that you don't get to see the paint strokes.Isn't so easy??I added some swirls and ribbon with bow to make it look like a ribbon tied on it.


This is how the box looks after painting.


Why buy those gift boxes when you can make your own personalized one ?? These simple techniques costs you fraction of amount that you spend on store bought gift boxes and also you get these boxes for free.Makes sense ,right??
Do you find these boxes are perfect for gifting??Start collecting them and use it for the holiday season.(It is not so early to do!!)
What do you think ?? Feel free to share your comments below or write to vikalpah@gmail.com .