


This post may contain affiliate links.By clicking the link and purchasing items through my links doesn't cost you anything but I receive a small commission.The money helps me buy craft supplies to bring you new creative ideas each week.
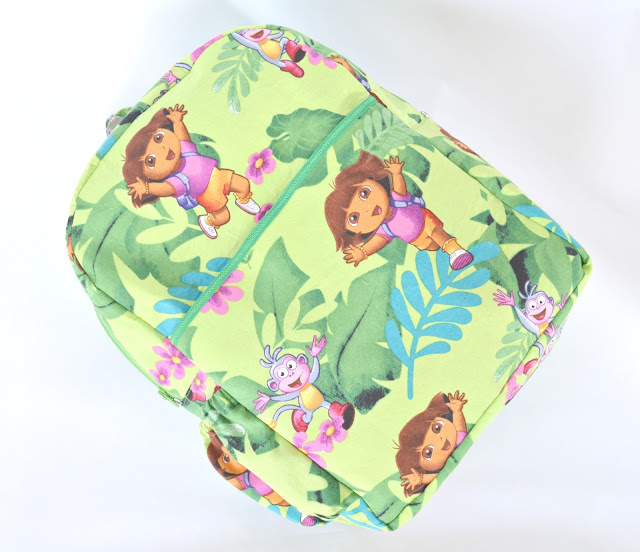
Last year I made a mini bag for my niece using Dora print fabric as it is her favorite cartoon.One day during a random phone conversation with her, she asked for a bigger Dora bag as she cannot carry many things in her small bag. So, I decided to make her a Dora Backpack for her birthday this year. I haven't stitched any backpack till now, so I took this as a challenge and made my own pattern to sew this backpack. This came out quite well except in few places. I think they are so negligible mistakes which I have to work on to avoid in my future projects. Now, let's get to the making of this bag.

Materials Used:
Cotton fabric - 1 yard
Nylon - 3/4 yard
Interfacing - 1 yard (I used Pellon 809 decor bond)
Interfacing - 1/8 yard (Fusible Thermolam plus)
Magnetic clasp
Zipper - 22"
Elastic 1/2" - 10" approx length
D-rings - 4 as straps adjusters
Bias tape
Hand sewing needle
Sewing thread
Pattern for Front and back panel
Measurements:
Front and back panels - 10.5" X 14" (If you want to make your own pattern, otherwise you can click the link above to print the pattern.Make sure you align edge to edge and tape it to get the complete pattern)
Front pocket - 10.5" X 9"
Zipper panels - 2"X 22" - 2 pieces
Side panel - 4.5" X 26"
Bottle holder - 9.5" X 7"
Shoulder Straps - 8" X 11.5" - 2 pieces
Strap extender - 3" X 20" - 2 pieces
Hanger loop - 4" X 3.5"
D-rings holder - 3" X 5" - 2 pieces
Interfacing: I used Interfacing for all the parts mentioned in the measurements except the bottle holder,strap extender and mini pieces like hanger loop & D-rings holder. I used Fusible Thermolam plus interfacing for the Shoulder straps to give some extra bulkiness and softness.
Lining : I used lining for front and back panels, Zipper panel, side panel, front pocket and bottle holder.


Step 1: Attach one part of the magnetic clasp in the center of the front pocket lining(Wrong side) with a piece of interfacing for extra support.


Last year I made a mini bag for my niece using Dora print fabric as it is her favorite cartoon.One day during a random phone conversation with her, she asked for a bigger Dora bag as she cannot carry many things in her small bag. So, I decided to make her a Dora Backpack for her birthday this year. I haven't stitched any backpack till now, so I took this as a challenge and made my own pattern to sew this backpack. This came out quite well except in few places. I think they are so negligible mistakes which I have to work on to avoid in my future projects. Now, let's get to the making of this bag.

Materials Used:
Cotton fabric - 1 yard
Nylon - 3/4 yard
Interfacing - 1 yard (I used Pellon 809 decor bond)
Interfacing - 1/8 yard (Fusible Thermolam plus)
Magnetic clasp
Zipper - 22"
Elastic 1/2" - 10" approx length
D-rings - 4 as straps adjusters
Bias tape
Hand sewing needle
Sewing thread
Pattern for Front and back panel
Measurements:
Front and back panels - 10.5" X 14" (If you want to make your own pattern, otherwise you can click the link above to print the pattern.Make sure you align edge to edge and tape it to get the complete pattern)
Front pocket - 10.5" X 9"
Zipper panels - 2"X 22" - 2 pieces
Side panel - 4.5" X 26"
Bottle holder - 9.5" X 7"
Shoulder Straps - 8" X 11.5" - 2 pieces
Strap extender - 3" X 20" - 2 pieces
Hanger loop - 4" X 3.5"
D-rings holder - 3" X 5" - 2 pieces
Interfacing: I used Interfacing for all the parts mentioned in the measurements except the bottle holder,strap extender and mini pieces like hanger loop & D-rings holder. I used Fusible Thermolam plus interfacing for the Shoulder straps to give some extra bulkiness and softness.
Lining : I used lining for front and back panels, Zipper panel, side panel, front pocket and bottle holder.


Front panel:
Step 1: Attach one part of the magnetic clasp in the center of the front pocket lining(Wrong side) with a piece of interfacing for extra support.

Step 2: Sew the front and lining of the front pocket together by sandwiching them between the bias tape. I also used zig-zag stitch above the normal stitch for some extra security. As nylon is very sheer, I felt like a single stitch was not enough.

Step 3: Now attach the another side of the magnetic clasp at the appropriate place on the front panel. I have discussed in detail on how to attach the magnetic clasp in my mini Dora bag tutorial. Then sew the front pocket onto the front panel. Sew along the corners with 1/4" seam allowance. The front panel is now ready.

Back panel:
Hanger Loop :
Step 1: Fold the piece(2.5" X 5") in half and iron. Open then fold the sides meeting the center crease/iron line and then fold in half again.Sew with 1/8" allowance and repeat the same on the other side. See step 6 here for better understanding of this step.

D-rings holder :
Step 1: Repeat the same step as hanger loop.Fold the stitched loop in half and place couple of d-rings into the loop and make a stitch to secure the rings.

Shoulder Straps :
Step 1:Follow the same procedure of ironing and folding as previous steps. But before sewing the edges, iron a fusible thermolam plus on one side of the fold. The thermolam measurements will be 2"X11". I have subtracted 0.5" in length as you will be folding and sewing the raw edges. Fold the raw edges and place the D-rings holder in the center before sewing. Secure them well with two stitches, then sew the corners to complete the shoulder strap. Repeat the same for the other one.

Straps Extender :
Step 1: Again the same process of folding, ironing and sewing. Fold and sew the ends before the sides for a neat finish.
Assembling the back panel:
Step 1: Pin the hanger, shoulder straps and strap extenders in its place. There is no hard and fast rule for this. I just measured the center point for the hanger loop and half an inch from that I pinned the shoulder straps. And for the strap extenders , I measured one inch from the bottom and pinned them.
Stitch twice or thrice, use reverse stitching for a strong hold. The back panel is now ready.

Zipper Panel:
Step 1: Sew each piece on either side of the zipper using 1/4" seam allowance.

Side panel :
Step 1: Attach side panel to the zipper panel with 1/2" seam allowance. The length I have mentioned here might be slightly larger than required (around 1/2" to 3/4"). So I recommend you to check it by pinning around the front panel once before attaching the second side of the side panel to the zipper panel.

Attaching the bottle holder :
Step 1: Take the outer piece and lining together. Fold and sew to create a 1/2" inch opening for elastic at the top.

Step 2: Thread a hand sewing needle and make a running stitch at the bottom to create gathering.Gather the bottom so that the width is equal to the side panel width (4.5") .
Step 3: Insert the elastic into 1/2" inch opening.

Step 4: Mark the place where you want the bottle holder on the side panel. Place the bottle holder right sides facing each other and stitch the bottom.

Step 5: Flip it and sew the sides to complete the bottle holder.

Connecting the side and front panel :
Step 1: Connect the center points of the front panel and zipper panel. Start pinning all around using straight pins.

Step 2: Sew all around to attach the side panel to the front panel.

Connecting the back panel to complete the bag:
Step 1: Repeat the same steps as before and sew all around to complete the bag. Don't forget to unzip the zipper to turn the bag inside out. Make sure everything is perfect. Go over, all the edges to shape the bag. If you have planned for a bag without lining, you are done.


But I have planned to line the bag.So, let's get to the lining part.
Lining the bag :
Step 1: Sew one part of the zipper and side panels to the front panel as shown .Repeat the same to sew the back panel and another zipper panel. Make sure to leave 1/4" allowance in the zipper panel to fold and sew later.

Step 2 : Turn the already stitched bag to the wrong side. Turn the lining stitched to right side facing out. Now insert the bag into the lining and pin along the zipper and sides to secure. Sew along the sides of the zipper (top stitch) and sides to complete the bag. Turn the bag inside out and be amazed at your own hand sewn backpack.


Hope you like this step by step tutorial on how to sew a toddler backpack.I made this backpack in such way that it should at least hold papers of A4 or letter size.
The fabric measurement of one yard may be bigger for a backpack like this if you chose to make this with a different print. As I wanted this bag to be full of Dora's wherever possible, it consumed a little extra fabric for me. But remember, extra is always safer when it comes to sewing. I chose 22" zipper as I wanted a wide opening but you can change it if you want. I really liked how the bottle holder turned out too. What extra will you add to this backpack if you have made this? Or what you would have not included? Share them in the comments below. As always I will be happy to hear it from you.
Other sewing projects you might like:
A fabulous backpack Sahana. Adding the water bottle holder is a great idea. As always, a comprehensive tutorial.
ReplyDeleteFeatured today, Sahana...
DeleteCute backpack and a great tutorial! Thanks for sharing.
ReplyDeleteThank you Connie :)
DeleteWhat a cute fun project! Love the fabric also and the drink bottle pouch! Saves digging around looking for it when your on the go!
ReplyDeleteThank you so much for sharing over at Waste Not Wednesday! Looking forward to seeing what creativeness you share with us this week! :-)
Thank you, Sam :)
DeleteYou are amazing at what you can do - this is adorable!! I need to get some sewing lessons from you. :) #HomeMattersParty
ReplyDeleteOh my gosh, this is adorable!! Love your amazing sewing skills!
ReplyDeleteThanks for sharing at the #InspirationSpotlight Party. Pinned & shared.
Wow, I wish I could make something like this! You've got great skills. I love how you can use kids' favorite characters/theme fabric to make them a 100% unique backpack.
ReplyDeleteHappy to be cohosting the #HomeMattersParty with you this week!
If only my girls were little again. I would so make these for them. Love having you as a cohost on #homemattersparty.
ReplyDeleteWOW!!! This is remarkable. It looks like it was store bought. Your tutorial pictures are awesome too. Great job!
ReplyDeleteThank you for sharing this with us on the #HomeMattersParty.
the pattern link won't work, would love to make one for my grandson :(
ReplyDeleteHi Lisa, The link is actually working fine. I tried opening in 2 to 3 browsers. I don't know why it is not working for you. If you need the pattern, I can email it you. Please send me an email to vikalpah@gmail.com
DeleteThis is so darling! I so wish I could sew! #HomeMattersParty
ReplyDeleteYou did such an awesome job! @Michelle James I wish I could sew too!! lol. #HomeMattersParty
ReplyDeleteDo you have the finished measurements? I'm trying to decide if this will come out any bigger than the one we have now
ReplyDeleteDo you have the finished measurements? I'm trying to decide if this will come out any bigger than the one we have now
ReplyDeleteIt is approx 9.5" W X 13" H Hope this helps you to decide :)
DeleteHi,
ReplyDeleteCan I sell backpacks made with your pattern?
I have a small webshop: www.isamade.be
you can email me isabelle.catrysse@telenet.be
Thanks! Kind regards, Isabelle
Thank you very much!!!!
ReplyDeleteIs there a video tutorial about this?
ReplyDeleteI might want to thank you for the endeavors you have made in composing this article I am trusting the same best work from you later on too .
ReplyDeleteLove this backpack. Made one for our toddler and she loves it! Think I will use plastic buckles instead of the D-rings next time because the straps keep slipping out. Might be because I used quite large D-rings though.. Thanks for the pattern!
ReplyDeleteYou're Welcome. Glad you liked it. I had no problem with D-rings as I said you can used a knot to secure it in place. Thank you for taking time to comment:)
Deletewhere is the link to the pattern
ReplyDeleteUnder Material used:)
DeleteLoved this! Thank you! My lovely three year old spilt slime all through his old back pack, I’ve never made a bag before but figured why not, I found this clear and easy to follow. Thanks again!
ReplyDeleteA handbag carried during the day is usually larger than the one that you'll be taking to dinner. No matter what the occasion, it is never appropriate to put one's handbag on the table-it is considered extremely rude no matter how expensive or beautiful it is. We often place our handbag on the kitchen counter, a bench, and some even momentarily meet the floor so for hygiene reasons alone, it is not acceptable. Online Shopping
ReplyDeleteThanks for sharing. You did a splendid job of designing and making your bag. Even thought of a wonderful way of having them carry their own dinner!! Very cute.
ReplyDeleteThe economy is fragile and, therefore, something like a government shutdown could become
Delete휴미추천업소
쩜칠추천업소
프리덤추천업소
불밤추천업소
궁합추천업소
찰덕궁합추천업소
토끼추천업소
샤쿠미추천업소
불밤추천업소
달새추천업소
Currently, there are many tutors, however, not all of them can help you achieve your goal. In any case, I guess tutors really help to improve the process of learning and preparing for the exam, so I would like to say that using the help of tutors is also a wise decision so you can take a look at this site https://promova.com/blog/15-hyped-songs-on-tik-tok-to-boost-your-vocabulary to see private tutors who can help you achieve the desired result in English. It's really cool.
ReplyDeleteThanks for sharing such a wonderful craft. Crafting may need many types of stationary stuff such as scissors, colors, and others. If you run out of stationary, a stationary wholesale website can help you to continue your work again.
ReplyDeleteThis comment has been removed by the author.
ReplyDeleteGreat ! Love this backpack. Made one for our toddler and she loves it!
ReplyDeletecpq training
That looks cute. I love the design of that one! metal stair spindles
ReplyDeleteStruggling with complex accounting problems? Get expert Accounting Assignment Help to navigate through financial statements, balance sheets, and intricate calculations with ease. Our service offers personalized support tailored to your specific needs, ensuring a deeper understanding of key accounting principles. Whether it's managerial accounting, financial accounting, or auditing, our experienced professionals are here to help. We provide step-by-step solutions, thorough explanations, and practical examples to enhance your learning experience.
ReplyDeleteZawsze myślałam, że bieganie to sport dla młodszych ludzi, ale w pewnym momencie zdałam sobie sprawę, że to może być doskonały sposób na poprawę kondycji i samopoczucia. Zdecydowałam, że spróbuję, ale nie wiedziałam, od czego zacząć. Szukałam informacji i znalazłam ten artykuł https://podhale24.pl/motoryzacja/artykul/99215/Jak_zaczac_biegac_art_sponsorowany.html , który stał się dla mnie prawdziwą inspiracją. Autorzy podkreślają, że wiek nie jest przeszkodą, ale ważne jest, aby podejść do biegania z głową. Szczególnie przydatne były dla mnie wskazówki dotyczące stopniowego zwiększania intensywności treningów i wyboru odpowiednich butów. Teraz regularnie biegam i czuję się o wiele lepiej, a bieganie stało się dla mnie sposobem na relaks i dbanie o zdrowie. Polecam przeczytać wszystkim, którzy myślą, że bieganie nie jest dla nich – ten artykuł przekona Was, że warto spróbować!
ReplyDeleteThanks for sharing the amazing post. if you want know about Magento 2 Store Locator then contact us.
ReplyDeleteI have discovered this gorgeous toddler backpack and can't help but admire its use and attractiveness! It's astonishing how well-designed these bags are for tiny ones. When investigating dissertation topics for construction project management you might find it intriguing to investigate how ergonomics and safety in design could apply to ordinary objects.
ReplyDeleteWhen my family moved into a new, larger house, we were thrilled with all the space. But one thing we didn’t anticipate was the horrible mobile signal in certain areas of the house. We noticed immediately that some rooms had little to no reception, while others had just barely enough to send a text. It was a major inconvenience, especially since my kids and I rely on mobile data for everything from schoolwork to streaming entertainment. I tried calling my mobile provider, but they couldn’t offer a solution other than suggesting we move closer to a window, which wasn’t feasible. After weeks of frustration, a friend recommended I check out signal boosters, and that’s how I discovered Mobile Signal Boosters https://www.mobile-signal-boosters.shop/ . They offered a range of boosters for larger homes, and we decided to go ahead and invest in one. I wasn’t sure if it would make a big difference, but I was blown away by the results. The signal is now strong throughout the entire house, including the basement and upstairs rooms where we had zero reception before. Not only can we make calls without any issues, but the internet speeds have also improved significantly. If you’re living in a large house with dead zones, this is definitely worth looking into.
ReplyDeleteتی چارتر
ReplyDeleteخرید vpn v2ray
ReplyDeleteI have discovered this gorgeous toddler backpack and can't help but admire its use and attractiveness! It's astonishing how well-designed these bags are for tiny ones.
ReplyDeletehow many points is reckless driving in virginia
Cricket Bet ID is your trusted partner in exploring the thrilling world of cricket betting. Whether you're a seasoned punter or just stepping into the excitement, Cricket Online ID provides a seamless, secure, and user-friendly platform to enhance your betting journey. Experience real-time match updates, diverse betting options, and unbeatable odds to make informed decisions. Sign up now and take your passion for cricket to a new level with Cricket Bet ID—a platform designed for cricket enthusiasts and betting aficionados alike!
ReplyDeleteI absolutely love the idea of a DIY toddler backpack! It's a great way to add a personal touch while ensuring it's both functional and cute. As a ghostwriter online, I often work with parents who want to create unique, handmade items for their kids, and this project is the perfect inspiration for those looking to add a bit of creativity to everyday essentials!
ReplyDeleteStanford University Admissions is one of the most competitive processes in the world, and for good reason. The university attracts thousands of highly qualified applicants each year, all hoping to join its world-class academic community. The admissions process at Stanford is holistic, meaning that it's not just about high grades or perfect test scores. Applicants are evaluated based on their academic achievements, extracurricular activities, personal essays, and letters of recommendation.
ReplyDeleteIt's essential for prospective students to present themselves as well-rounded individuals who not only excel academically but also demonstrate leadership, creativity, and a passion for making a difference. Crafting strong essays that reflect who you are and why you’re interested in attending Stanford can be the key to standing out. Remember, Stanford University Admissions is about finding individuals who will contribute positively to the campus culture, so highlighting your unique experiences and perspectives is crucial.
In the end, while the process is highly selective, with careful preparation and a strong application, students can increase their chances of receiving an offer from this prestigious institution.
Guten Tag, ich suche nach einem Unternehmen oder einer Dienstleistung, die mir bei der Erstellung meiner Bachelorarbeit oder anderen akademischen Arbeiten helfen kann. Es ist wichtig, dass die Hilfe zu einem erschwinglichen Preis angeboten wird. Könnte mir jemand eine vertrauenswürdige und kostengünstige Lösung empfehlen, die mir dabei hilft, qualitativ hochwertige Arbeiten zu verfassen, ohne mein Budget zu sprengen? Es wäre großartig, wenn die Hilfe sowohl effizient als auch professionell wäre.
ReplyDeleteEs ist erstaunlich, wie wichtig es ist, bei wissenschaftlichen Arbeiten auf die Qualität und Präzision zu achten. Wenn man eine Diplomarbeit schreibt, stellt sich oft die Frage, wie man diese Herausforderung effizient und gleichzeitig professionell meistern kann. Besonders in Zeiten, in denen die Anforderungen an wissenschaftliche Arbeiten immer komplexer werden, ist es entscheidend, Unterstützung zu finden, die einem hilft, den Überblick zu behalten und die Arbeit erfolgreich zu gestalten https://diplomarbeitenschreibenlassen.de/.Eine der besten Möglichkeiten, um den Stress und die Unsicherheit zu verringern, ist es, auf Experten zurückzugreifen, die Erfahrung in der Erstellung von wissenschaftlichen Arbeiten haben. Diplomarbeitenschreibenlassen.de bietet genau diesen Service – eine maßgeschneiderte Unterstützung, die den gesamten Prozess abdeckt. Von der Themenwahl über die Recherche bis hin zur finalen Abgabe wird man von Fachleuten begleitet, die ihre Expertise in verschiedenen Bereichen einsetzen können.
ReplyDeleteDer Vorteil dieser Art der Unterstützung liegt nicht nur in der fachlichen Kompetenz, sondern auch in der Tatsache, dass man von einem effizienten Arbeitsprozess profitiert. Gerade wenn man unter Zeitdruck steht oder sich unsicher ist, wie man die Anforderungen der Universität erfüllen kann, ist es eine enorme Erleichterung, wenn man sich auf einen erfahrenen Partner verlassen kann. Bei Diplomarbeitenschreibenlassen.de kann man sicher sein, dass die Arbeit nach den höchsten akademischen Standards erstellt wird.
Herzlichen Dank!
DeleteGreat post! Thanks for sharing! Academic pressure can take a toll on a student's mental health. Stress, anxiety, and burnout are common issues during exam seasons or when multiple deadlines overlap. Assignment Help can serve as a stress-reliever, offering timely support and ensuring students don’t compromise on quality due to time constraints. It’s not just about getting the work done—it's also about understanding the material through detailed explanations and sample solutions. When used appropriately, this kind of support can help students maintain balance in their academic and personal lives while still achieving their educational goals.
ReplyDeleteAfter studying footwear design, it’s great to explore the variety of career options that open up. While many might think of retail or direct design work, there are also opportunities in digital fields, such as marketing or online sales. Speaking of engaging platforms, I’ve found 1xBet to be a fun way to unwind. While it's not directly related to design, platforms like https://thejazzpackages.com/how-the-aviator-game-works-on-1xbet-to-play-it/ can offer a fun distraction and might spark some creative ideas after a busy day of design work. It’s always great to take breaks, and 1xBet is a great place to have some fun!
ReplyDeleteIt's wonderful to investigate the range of employment opportunities that become available after studying footwear design. Retail and direct design employment may come to mind for many, but digital industries like marketing and internet sales also provide opportunity. Speaking of entertaining platforms, I've discovered that https://thejazzpackages.com/how-the-aviator-game-works-on-1xbet-to-play-it/ is a great way to relax.
ReplyDeleteThat’s such a sweet and thoughtful idea! Kids really treasure those little details , especially lansing web development when it’s something made just for them with their favorite character. I’m sure she’ll absolutely love the Dora backpack even more than the mini bag—you’re making such special memories for her!
ReplyDeleteThis DIY toddler backpack sounds like such a fun project! I totally appreciate the affiliate links helping you get more craft supplies for new ideas. Keep them coming! Sometimes I find it hard to carve out craft time, especially when I get sucked into a game like that bad time simulator – it really makes the hours fly by!
ReplyDeleteThis backpack is absolutely adorable! It is such a special way to send a little one off to preschool. The back-to-school season is always such a busy time for parents—between making cute gear like this, buying supplies, and updating family paperwork. It’s actually the time of year I usually sit down with my Centerville State Farm Insurance Agent to make sure our policies are up to date before the chaos of the school year starts. It feels good to have everything sorted, from the backpack to the coverage!
ReplyDeleteWhat a creative and useful idea for toddlers! Handmade projects like this add a personal touch and encourage learning through play. Supporting creativity at a young age plays an important role in Grace Cares and overall well-being.
ReplyDeleteThis backpack turned out absolutely adorable! I really admire how you challenged yourself by drafting your own pattern and still achieved such a polished, functional result. The bottle holder and adjustable straps are especially thoughtful touches for a toddler’s everyday use. Your step-by-step instructions and clear measurements make this feel very approachable, even for someone who hasn’t sewn a backpack before. Creative DIY projects like this really show how planning and organization matter just as much as sewing skills. I often find that having reliable resources helps with that balance too — sites like 247GulfJobz Online can be useful when juggling creative goals alongside everyday responsibilities. Thanks for sharing such an inspiring and well-documented project!
ReplyDeleteSuch a charming and functional backpack design it’s always nice to see projects that combine creativity with practicality. DIY content like this reminds me how creative thinking applies across different fields, whether it’s crafting or working with The Broadcast Store. I enjoyed reading this and picking up new ideas.
ReplyDeleteI appreciate that TypeType font pairs focus on usability. So font foundry feel designed for real content rather than abstract examples. This makes it easier to apply them directly to projects with confidence.
ReplyDeleteSuch a heartwarming and inspiring project! Turning your niece’s simple wish into a custom Dora backpack—and drafting your own pattern as a first-time backpack sewist—is seriously impressive. Those “tiny mistakes” are just proof you challenged yourself, and the result is a meaningful, handmade gift she’ll treasure (and actually use!). Moviesjoy TV
ReplyDeleteReally helpful post! The MCW sign up process is explained in a very simple and user-friendly way here. I especially liked how you covered the step-by-step registration and common issues new users face. This kind of clear guidance makes it much easier for beginners to get started without confusion. Keep up the great work—looking forward to reading more informative content like this!
ReplyDeleteMCW sign up
Solve My Assignment
ReplyDeleteSolve My Assignment offers assignment help online to solve your homework thetutorshelp and assignments that seem like dead weight.one has got to prepare for competitive exams. along with various subjects, they even have to handle a variety of co-curricular activities. For these reasons, students seek assignment assistance from the Exemplary Assignment Solver Service We always deliver the assignments to you before your submission deadline. you'll come to us albeit you've got only hours to submit your assignment and that we will deliver that to you within the shortest time span. Yes, we are available 24x7 to provide you all assignment help . We take pride in our customer service as our customers are someone who goes to vary the planet for good...
https://www.thetutorshelp.com/solve-my-assignment.php
Solve My Assignment
Pay For My Assignment
ReplyDeleteOne of the biggest concerns students have is the safety of paying for homework online. thetutorshelp prioritizes your financial security. One of the main reasons students choose to pay for their assignments is to save time. With multiple deadlines to meet and a busy schedule, it can be challenging to give each assignment the time and attention it deserves. By delegating your assignments to our professional writers it's crucial to research the service provider thoroughly, read reviews from other customers In conclusion, paying for an assignment can be a helpful solution for students facing overwhelming academic workload
https://www.thetutorshelp.com/pay-for-my-assignment.php
Pay For My Assignment
Assignment Editing Services
ReplyDeleteAssignment Editing Services Our team of experienced editors are highly skilled in editing all types of assignments, including essays, research papers, thesis papers, and more. They have years of experience in the academic field and are familiar with the standards and guidelines set by various institutions. Are you a student struggling with your assignments? Do you want to ensure that your assignments are error-free and well-structured? Assignment editing services can edit a wide range of assignments, including essays, research papers, reports, case studies, and more.
https://www.thetutorshelp.com/assignment-editing-services.php
Assignment Editing Services
Best Minitab Assignment Help
ReplyDeleteBest Minitab Assignment Help Get the best Minitab assignment help at an affordable price. Minitab Assignment Writer provides writing service. Experienced Minitab assignment help expert writers are available with us. Best professional writers are available for you to solve your most difficult homework assignments Minitab assignment help. Safe assignment is provided for the application. It takes enough valuable people to participate in the assignment. Research assignments are provided along with the projects. Best option available for assignment help. Minitab's assignment help has a wide range of uses. The best professional writers for Minitab assignment help take care of certain factors such as assignment problems, statistical analysis, learning process, etc
https://www.thetutorshelp.com/minitab-assignment-help.php
Best Minitab Assignment Help
Machine Learning Assignment Help in Australia
ReplyDeleteNeed Machine Learning Assignment Help in Australia? Our expert writers provide top-quality solutions for students seeking Machine Learning help Online Whether you’re studying in Sydney, Melbourne, Brisbane, Perth, Adelaide, or Canberra, our online support is available nationwide. Machine learning combines mathematics, statistics, and computer science. Australian universities often set industry-aligned assignments that test both concepts and implementation. Students commonly face difficulties such as:
https://au.thetutorshelp.com/machine-learning-assignment-help-in-australia
Machine Learning Assignment Help in Australia
Engineering Assignment Help in Australia
ReplyDeleteThe bast Engineering Assignment Help in Australia Students often feel Stressed with too many tasks, exams and assignments. This pressure affects their health and studies. Our goal is to ease this burden by offering expert academic support. Our experienced and qualified engineering writers help the students to complete their assignments before deadline with HD quality to achieve A+ grades. We’ve helped students across Australia in cities like Sydney, Melbourne, Brisbane, Perth, Adelaide, and more.Why Students Need Help with Engineering Assignments
https://au.thetutorshelp.com/engineering-assignment-help-in-australia
Engineering Assignment Help in Australia
Do my assignment Australia
ReplyDeleteDo my assignment Australia Our experienced team is Qualified to handle a wide variety of projects across different subjects. Whether it’s a complex research paper or technical task, when you hire us to write your assignment, you can expect au.thetutorshelp.com offers "Do My Assignment For Me Australia" for a Wide variety of academic tasks. Whether it's a detailed legal memorandum or a technical engineering project, we’re ready.In case you're stuck or need someone to do my assignment for me in Australia, our skilled staff is here to assist. We specialise in delivering top-notch
https://au.thetutorshelp.com/do-my-assignment-australia
Do my assignment Australi