


I stitched an apron to give as a gift awhile ago and I wanted to make an oven mitt set to go with the apron. I was debating myself whether I should get a set of oven mitt that retails for a couple of dollars or I should stitch one. I have an oven mitt that I got from dollar tree. I made an quality inspection to make an decision and find out that the stitches are not secure and the edges were fraying inside. As I don't want that kind of stuff to give as gift. I decided I should make them myself and the beauty of that is I can totally customize it to match the apron. So, Let see how to make one.

Materials Required :
Printed cotton - 1/4 yard
Solid cotton - 1/4 yard
Insul bright - 1/4 yard
Cotton batting - 1/4 yard
Sewing Machine
Matching thread
Scissors
Pattern
Straight pins
Step 1: If you already have an oven mitt , use that to make a pattern. I used a dollar tree oven mitt that I own to trace and make a pattern. You need two copy paper(8.5" X11") sheets to trace the pattern. Trace the outline of the oven mitt and add 1/2 inch seam allowance.(I added 1/4 inch while tracing pattern first time). Cut the pattern outline and use it cut the pieces of fabric for making oven mitt. You will need 2 pieces in printed cotton, solid cotton, insult bright and cotton batting. Also cut pieces for loop (2" X 5") and binding (2"X 18").

 |
Step 2: Pin all the four layers together (printed cotton, insult bright, cotton batting & solid cotton) in the mentioned order. When I searched to find out which side of insult bright should be placed facing out I did not get an definite answer. So, I think the side doesn't matter. Once the layers are pinned together, make stitches with even intervals on both sides so that it creates squares. There is no rule for quilting . You can even make random stitches. The ultimate aim here is to combine all the layers together. Trim the edges if there is any unevenness.

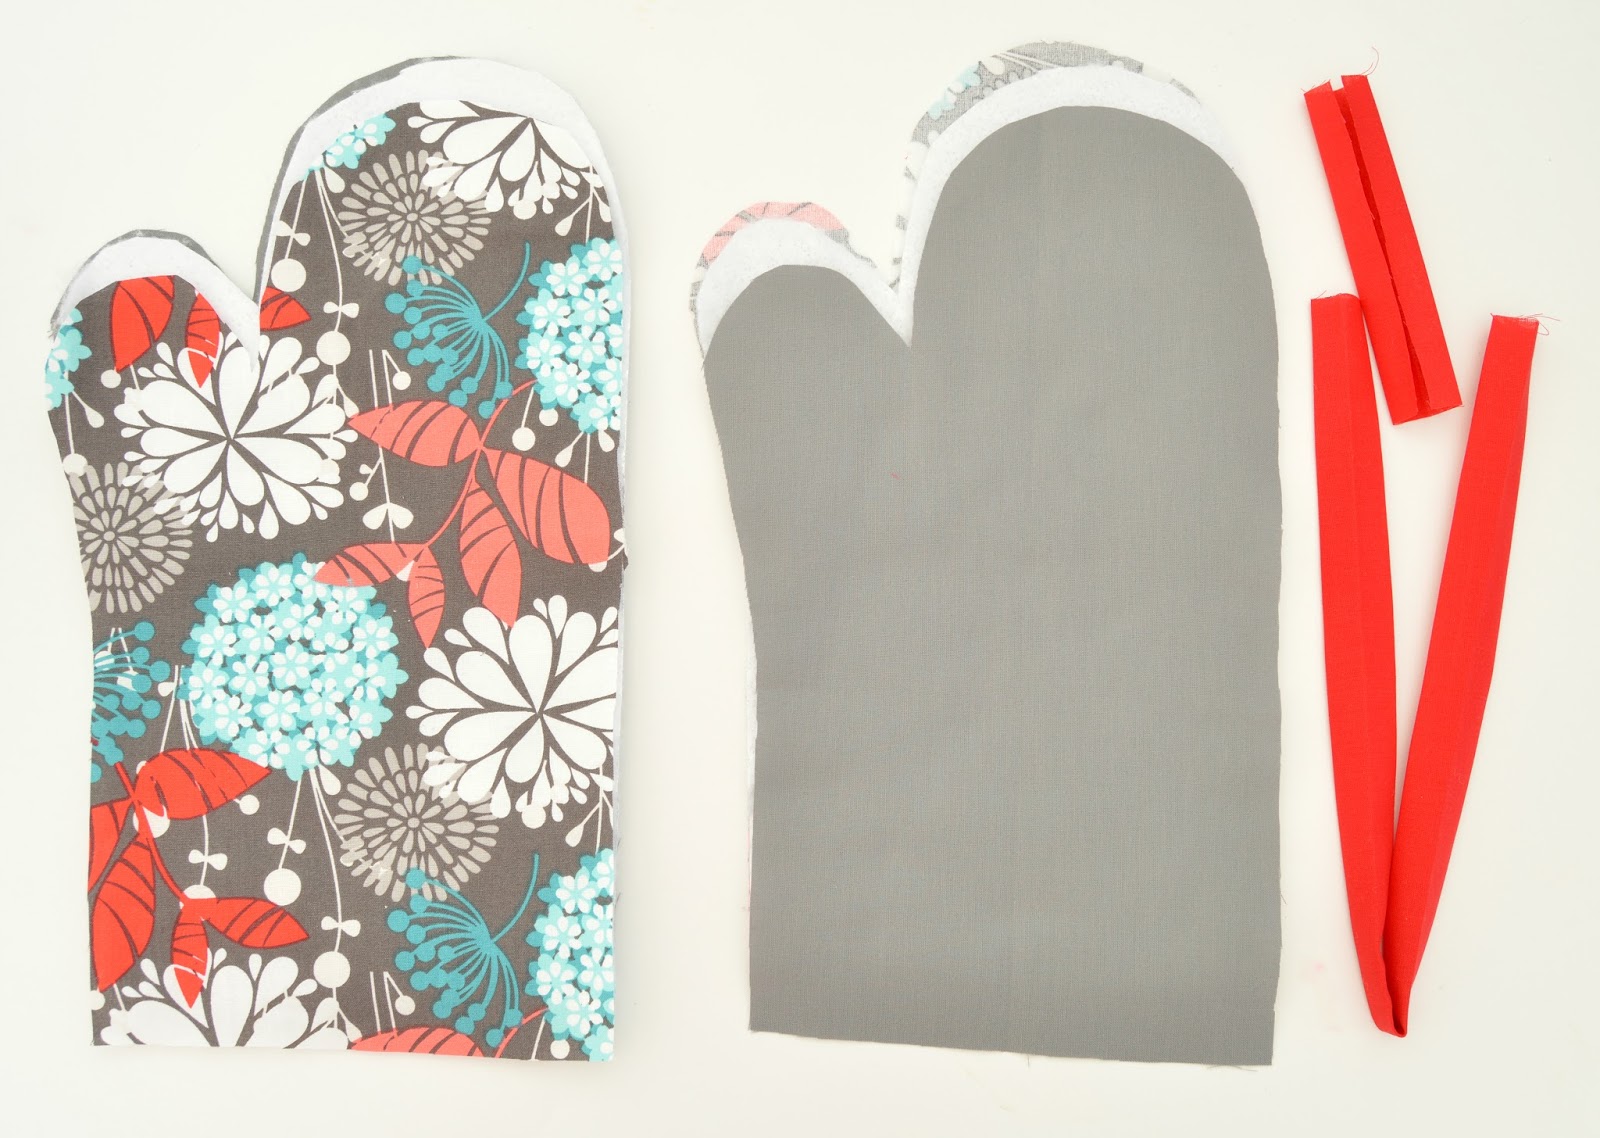
Step 3: With right sides facing each other (Printed cotton sides), make a stitch with 1/4" seam allowance. Use zigzag stitch on the corners to secure the fraying edges leaving the top of the oven mitt open.


Step 4: Turn inside out.Fold 1/2 inch inside on both sides and fold that into half and Iron. Do this for the loop and also for the binding strip. Stitch to secure the fold and the loop is done. Fold and stitch one end of the binding strip. Start aligning the edge of the binding strip to the edge of the oven mitt and pin. Fold the loop into half and pin it by placing between the oven mitt and the binding strip on the side. Leave the remaining binding strip so that it slightly overlaps and cut the excess binding strip. Make a stitch to secure.


Step 5: Fold the binding strip to cover the edges and make a stitch to complete the oven mitt.


Hope you liked this simple tutorial. If you are new to sewing , this is one of the simplest project to try.Share what you think about this project in the comments below. What oven mitt do you own? Is it a gift you got from someone or stitched your own or planning to make one for you? As always I would love to hear from you.
This looks so so nice, but I only sew really easy stuff like curtains and easy pillows...maybe i'll give this a try...Love it!
ReplyDeleteYou've done a fantastic job with this. I bet it made a lovely gift. I would have thought this to be much trickier than your instructions. I love the pattern on this too. Thanks for stopping by and joining in my link party too!
ReplyDeleteSally @ Life Loving
#LifeLovingLinkie
I love the material you used. Thanks for the great instructions and pictures!
ReplyDeleteLove the fabric you picked for your project. Great sewing DIY pinned & shared.Thanks for joining the Inspiration Spotlight party! See you again soon & hope you have a great rest of your week.
ReplyDeleteThis is really gorgeous! I love your project and tutorial! Thank you for sharing!
ReplyDeleteHope you have a wonderful weekend!
Hugs and love from Portugal,
Ana Love Craft
www.lovecraft2012.blogspot.com
You make this looks so easy, I bet I could even manage to make a pair for these. I used to sew all the time, just have not for a long time.
ReplyDeleteThank you for sharing on the Friday Favorites this week!
Hope you have a great weekend!
Karren
love this idea! Just think you can make your own oven mitts in your fav colors or to make your decor or to give as gifts! Thanks for the pattern and tute!
ReplyDeletelooks great
ReplyDeletelooks great
ReplyDeleteI'm having trouble with Step 4! Maybe another photo here? Otherwise the instructions are well written and easy to follow.
ReplyDeleteFirst make the loop, then fold and iron the binding as you normally do.Then open the binding and sew one raw edge of the binding along with raw edge of the oven mitt together as shown in the picture securing the loop. Then fold along the crease and top stitch. You can mail me at Vikalpah@gmail.com if you need any help.
DeleteHi there and welcome if you're new here! So, a little while ago I needed a simple way to talk to family in Tel Aviv without always dealing with call drops. I came across virtual phone number Israel on a travel planning forum and figured I’d test it out. Calls are way more consistent now, and the best part is it doesn’t require anyone on the other end to install anything. It’s just a regular number that works, and that’s all I needed.
ReplyDeleteExploring different sports betting options, I stumbled upon Swift Casino , and I like it. In the UK, placing small bets on matches while watching adds a subtle thrill. The site is fast, reliable, and secure, and occasional bonuses pop up, making it fun, casual, and surprisingly satisfying without pressure.
ReplyDelete