


Well today, we are again dealing with cereal box. I came through a big cereal box only after I made those cereal box baskets for easter that I shared last week. For a moment I sighed thinking I would have made a big basket instead of that smaller one but then I remembered one of my friend in our community center got a bunch of jewelry from India to sell and she had displayed them in just a plain cardboard piece at the office room . There was a lot of jewelry remaining to display so I thought why not a jewelry display from this big cereal box. I thought it would be interesting if I made it as a rotating display so I decided to use some found recyclable items at home to make this Jewelry display. Wanna know how? Let's see.

Materials Required :
One big cereal box
Paper towel roll
Cardboard (You can use shipping boxes)
Another small or big cereal box or any box of that kind
Empty painter's tape cardboard (If you don't have one you can use anything of that kind or make one with cardboard.)
Stones/Marbles/beans for weight
E6000
Contact paper
Scissors & Craft knife
Scrap book paper and Mod podge (Optional)
The below specified items are based on what type of jewelry you want store:
Sticky back Velcro (I used Industrial strength Velcro)
Clear tape or clear vinyl
One piece of felt
Command hooks
Step 1: Cut the top part of the cereal box and cover the whole box with contact paper.

Step 2: Take the paper towel roll and trace it in the bottom center of the cereal box and cut it out using craft knife.

Step 3: Now cut a cardboard piece which is bigger than the empty painter's tape roll. Use E6000 and glue one end of roll to the cardboard piece.

Step 4: Fill the paper roll with some weight. I used stones here. Cover the top with any desired scrap book paper of your choice. Also cover the entire paper roll and cardboard piece using scrapbook paper and Mod Podge. I used silver washi tape and covered the paper roll. But it is your choice to cover/mask them with whatever you have in hand. You can also use paint.It is totally up to you. I also covered the painter's tape roll in scrapbook paper. If you don't have any empty cardboard roll like the one used here, you can cut a long piece of cardboard and glue it or you can also use bigger diameter pvc pipe for this purpose.


Step 5: Now glue the painter's tape roll on to the cardboard base.Allow it to dry. Take the cereal box and insert it into the paper roll . You now have a rotating box around the paper roll.


Step 6: As this display is going to be in a public setting, I wanted to close the top part of the jewelry display so that it is safe and can also be used as storage for extra jewelry items. For this, use any extra cereal box or any box of that kind and make a top lid measuring the length and width. Cover it with contact paper and glue it to the box. Use binder clip to secure the lid to the box till the glue dries.


Step 7: Based on the purpose and kind of jewelry you are going to display, you can customize this box. I will share ideas for storing/displaying each type of jewelry, based on that you can DIY and complete the jewelry storage.
For Earrings:
This display is used mostly for earrings, so I measured and marked the areas and poked holes using push pins for the earrings. I planned in such a way that the stud type of earrings goes on top as it needs to be secured on the other side and the hanging types on the bottom.


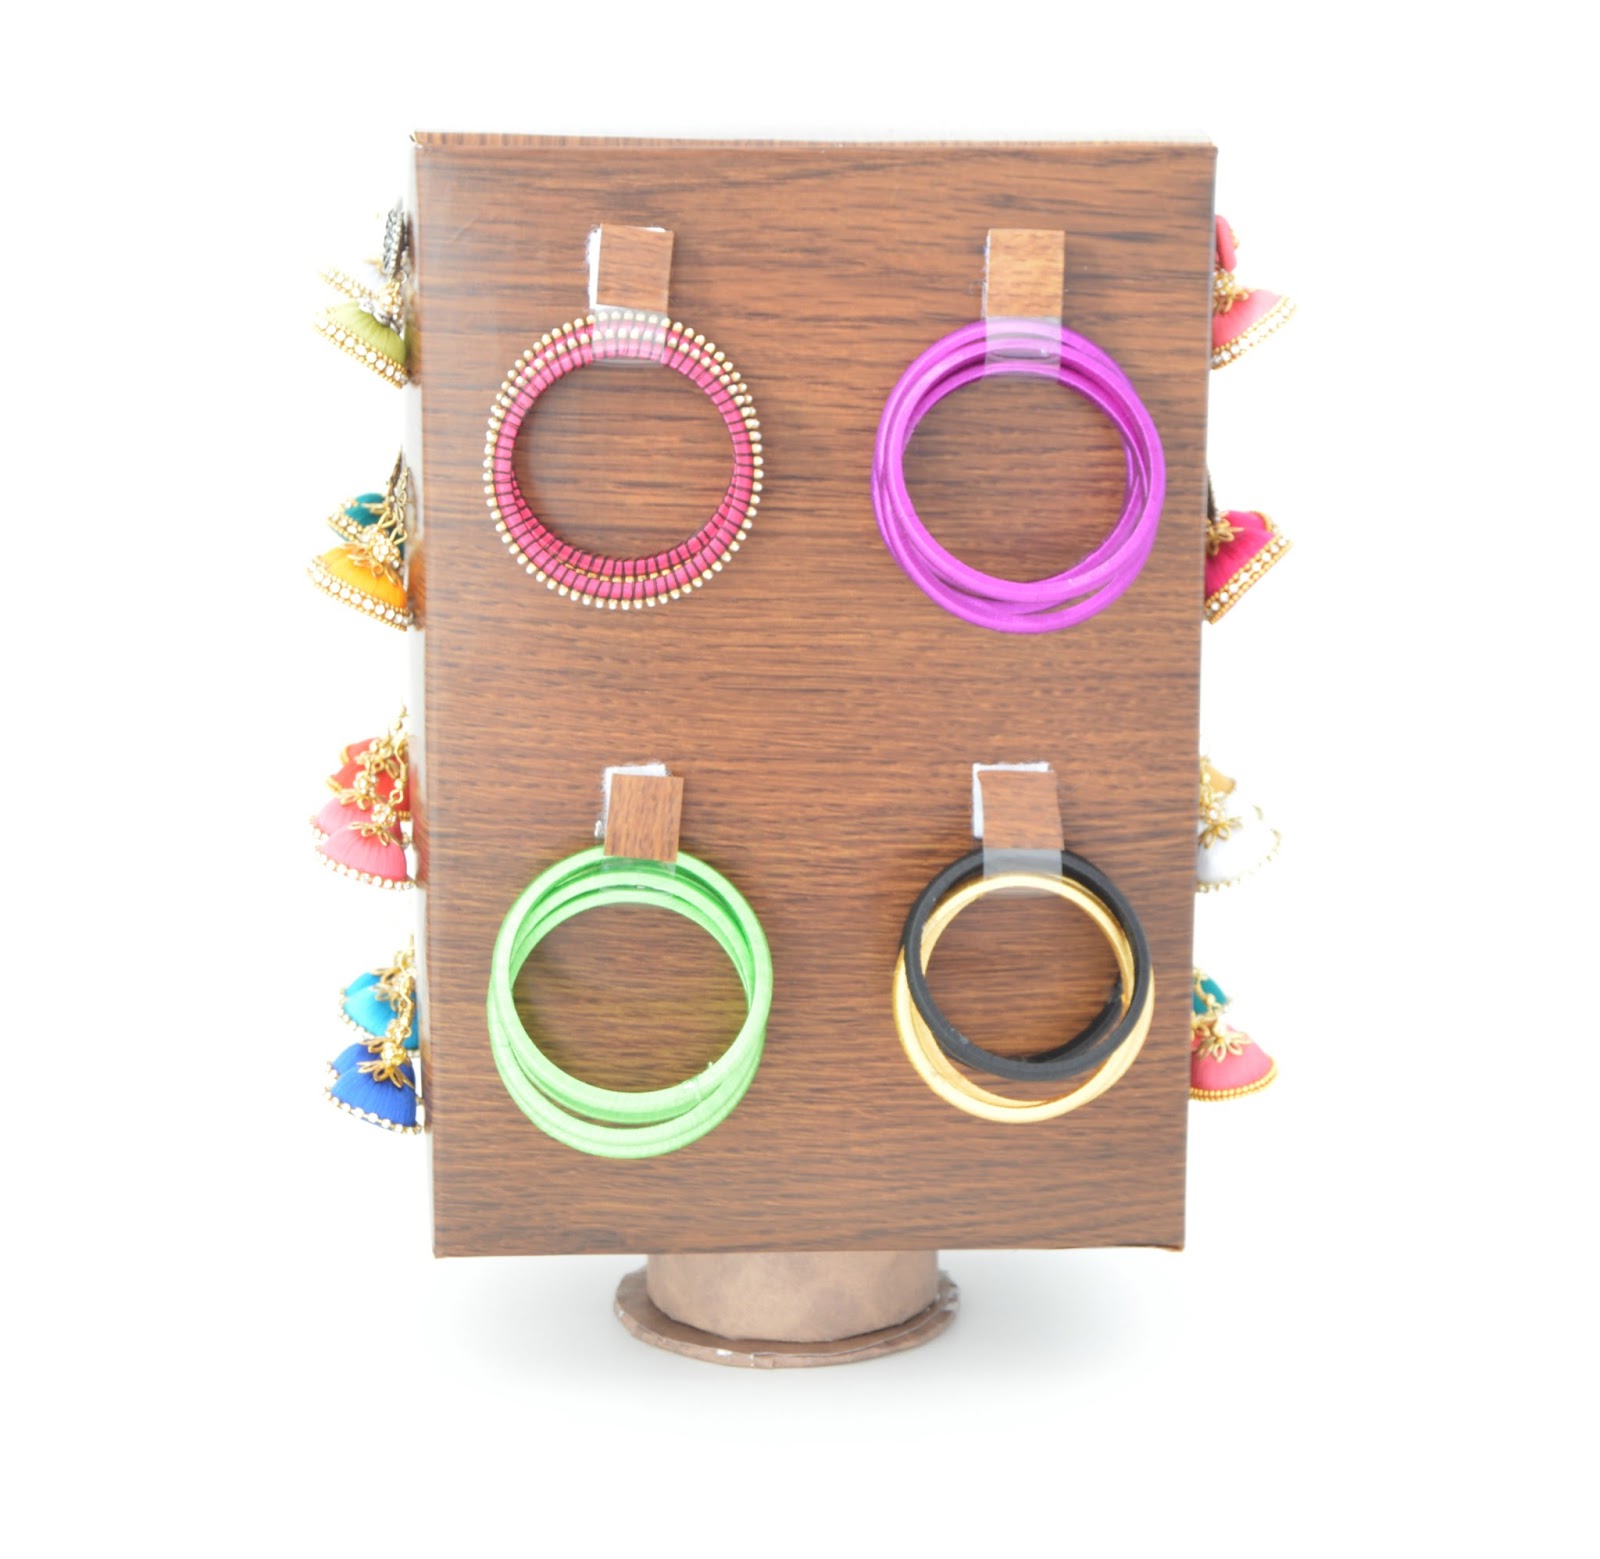
For Bangles/Bracelets/Watches :
Take a piece of vinyl( or fold clear tape/duct tape if you don't have vinyl) and cover one side with a piece of same contact paper you used to cover the cereal box. Now take another side and stick it on a piece of velcro(Loop side) halfway and stick the velcro to the cereal box. Stick another piece of velcro(hook side) to the contact paper side of the vinyl to form a loop. You can now add any circular form of jewelry to these loop for storage/display. You can also see how these loop hold watches too. You can also use them for bracelets or metal cuffs kind of jewelry.


For Necklaces/Bracelets:
This is as simple as that. Use command hooks to hang necklaces and bracelets. Instead of command strips, I used glue dots to stick them to the cereal box. You can also spray paint the hooks to match the contact paper you are using.

For rings :
Make a slit in cereal box with craft knife, roll a piece of felt and glue the edges to secure. Poke a inch or two of felt inside that slit using craft knife. Add a piece of velcro to the end to secure it in place. Dab a drop of glue in that inch of felt inside to secure it. I don't have much rings so I have just showed you an idea. But you can also use the velcro strip method to store rings.


Inside the box :

Hope you like this nifty idea of making a jewelry storage/display using the things lying around your house. This display is great even for your vanity or closet. So do try it an d let me know how it turned out. Here is a short clip of how the rotating feature works.
Share what you think in the comments below. As always I will be happy to hear from you.
Other cereal box crafts you might like:

This is awesome Sahana <3
ReplyDeleteThank you Ranjani :)
DeleteThis is the coolest thing ever!
ReplyDeleteThis is the coolest thing ever!
ReplyDeleteThis is one of the best inexpensive displays that I have seen so far. Thanks for sharing.
ReplyDeleteVery neat and inexpensive!
ReplyDeleteWhat a great idea for jewellery storage Sahana - Thank you for sharing with Pin Worthy Wednesday
ReplyDeleteHow adorable! What a cute and organized way to store jewelry!
ReplyDeleteI wanted to stop by and let you know that your post has been selected as a Feature for the Welcome Home Wednesdays Link Party! Stop by to see your post linked up and don't forget to grab your Featured Button as well! ~Lisa~
ReplyDeleteThat is adorable!! We are always looking for new ways to store our jewelry!! #HomeMattersParty
ReplyDeleteLove this! Such a great way to store and display your jewelry! Thanks for linking up with us for Friday Favorites. I'm featuring you this week at Simply Sweet Home!
ReplyDeleteClever idea! I love the fact that you made it out of recycled materials, too. Thank you for sharing it on the #HomeMattersParty
ReplyDeleteHow cute!! I wish I had enough accessories to justify making this! #HomeMattersParty
ReplyDeleteYour creativity is amazing!! Who would guess it is made out of a cereal box!! Love it!
ReplyDeleteThanks for sharing at Two Uses Tuesday, and I would love to invite you to share this with us at our new Sweet Inspiration party, http://sweethings.net/sweet-inspiration-link-party1/
Have a wonderful week!
This is such a fantastic DIY! I love it! Thanks so much for sharing with us at Merry Monday.
ReplyDeleteHi Sahana! This is such a great piece you made here! It's an amazing idea, and I love that you used all you had at home! You are so creative! Thank you for sharing this at Sweet Inspiration #1
ReplyDeleteI love your upcycled creations! You are so talented! #HomeMattersParty
ReplyDeleteI love your upcycled creations! You are so talented! #HomeMattersParty
ReplyDeleteWhat a clever idea! It is always great to be able to upcycle for something fun ad useful. Thanks for co-hosting at the #HomeMattersParty :)
ReplyDelete~Lorelai
Life With Lorelai
I never would have thought of using a cereal box. What a great way to upcycle. Love having you as a cohost on the #HomeMattersParty.
ReplyDelete