Friday, June 27, 2014

How to DIY (Dye-It-Yourself) triple tone striped shoes

Have you ever tried dyeing anything ??Well, this is my first time experience..So, I would say this post as sharing my first dyeing experience rather than a usual DIY tutorials.I got a pair of white shoes last winter knowing 100%  that I will some do something with that during summer.And now as summer has arrived full time ,took those white shoes to show my creative skills. .Now let us start the process of dyeing.


Materials Required:
Plain white shoes
Two colours of dye powder/liquid (Any brand of your choice) - I chose Rit dye -Teal and cherry Red.
Plastic /stainless steel container
Warm water
1 cup salt
Gloves
Foam brush
Small piece of white fabric to test.
Black fabric paint(Optional)
Masking tape(Optional)

There are many ways to dye a material and the dyeing process also differs according to the type of material used.So,I would recommend you to read the instructions at the back of the package before you dye.I used Dip dye method as I wanted to use 2 colours in same shoe.

Step 1: I used masking tape to cover the rubber part of the shoe.But I felt this as unnecessary step when I immersed the shoe into the dye bath.The tape came off and was causing disturbance, so I removed everything :P.So,I leave it you.This step is totally optional.(Are you thinking whether the rubber part may also get dye on it ??Of course ,the first thing is it also gets some dye but it washes off .Next,even though if there is some residual dye ,it not much noticeable.)

Step 2:Fill half of the container with warm water and 2 tablespoons of salt.(Mix well and add small amount of dye in the starting stage, mix well again.Now, take the sample piece and dip it inside the dye bath.Take out to check whether the colour is okay for you.If you feel it is lighter ,then you can add more dye.I felt the colour is okay for me , so I immersed the first half of the shoe inside the dye bath and left it there for about 15 minutes.(Before this step ,just wet your shoes in the normal water)
Can you see the tape coming off ?? 

This is the result after 15 mintues.

The container I used had a large base, so the shoes kept slipping inside the bath.(Tried to clip on ,but couldn't).If you want to avoid this , take a container which has a narrow bottom so that when you want to dye half portion of the shoe, it will be perfect.After the first trial of dyeing I added more dye and dyed the front portion a little dark and leaving it inside the bath for another 15 mintues.(I kept some stones inside the shoes to make it stand !!But then, I was checking it for every 5 mintues)


Step 3: As I was thinking a bit to use the same container for other side, this time I followed a different method .Prepared the dye bath and used a foam brush to dye.(Because I don't want the red colour to mix with teal colour).Dip the brush in dye bath and paint as you would do with normal paint.The more coating you give darker the colour.I did a little blending of colours in the middle part of the shoe.Result of which ended in some violet shades.(Ha!!Some colour theories are working here :))Yep!!I liked it.If you don't want to end up something you did not dream about, it is better to do a test sample and then try on the original one. 
If you want to dye the lace , do the same procedure.But keep it mind that the dye smears little above the area you expect the material to be dyed.(Again!!Some chemistry and capillary actions :)). I dyed it in half red and half teal colour :) but it ended in lighter shades of blue and pink as I did not wait for long time.If you want a darker shades of teal and red ,immerse it in the dye bath for longer time.


Step 4:Rinse it in warm water, then in cool water until water runs clear.(Warm water helps to rinse the residual dye in the surface effectively).Wash it in such a way the lighter portion of the material dyed should be up.When doing it for the double colour project do this step for first half separately and then the other half so that the colours won't mix up.

Step 5: Let it dry completely.Voila !!!You are now ready to wear your beautifully dyed triple tone shoes.
To take it to the next level, I added black stripes above it with fabric paint using masking tape.But it is totally a optional step.

The shoes are taking sun bath :P.Once they are completely dry ,you can wear it !!


I totally forgot to tell you about wearing gloves.Do wear gloves while experimenting this project.Or I am pretty sure your hands will turn into a huge mess.(Ya!!Experienced!!)At one time ,I got excited and put my hands into the dye bath without gloves and ended with teal fingers.So here is a tip !!If you are like me, use tooth paste or baking soda and rub it in your fingers to remove the dye and wash your hands.If you want more tips on this click the wiki link here.


Hope this post makes you also to try your hands on dyeing.Believe me it is fun to play with colours!! Feel free to share your comments below.What do you feel about this triple tone striped shoes??


Wednesday, June 25, 2014

Different ways to display photos

Normally, photos are displayed in frames, but now the trend is changing.There are many fancy ways other than frames to display photos.That too mainly for those photos which you took in the museum photo booth you went last weekend or those instant polaroid photos which took at the party. Today i am going to share with you some simple and easy ways to display it around your house.

1) Washi tape photo display :
Washi tape has versatile uses from card making to up cycling projects. It does not stick very strongly like a normal clear tape and so I thought I can use it to frame photo to display it on walls.It doesn't go well with the glossy paint wall as it doesn't have much stickiness but it is perfect for those matte finish wall.I tried and displayed our photos in one of the big mirror in our living room as we don't use it much !

I love polka dots.Does it not look cute ??


2)Memo board photo display : 
It is much easier way to display your photos in your office/home office if you have some memo board or cork board.Just use a thumb tack or push pin to display your photos.Don't have a memo board ?Click here to see How to make it.


3)Stone & Wire Photo display :
Stone ?? Wire ?? Yes ,It is stone and wire :)This display is inspired from one of the pins from Pinterest. I used a 20 gauge jewelry wire and a stone to display photos .The rough texture of rocks adds a texture to the desk and gives a nice aesthetic appearance to the desk.Wanna try this to display your last weekend hangout pics ?? Here is how you to do it.


Step 1: Use a pen and wind the end of the wire 3 to 4 times to make a coil.
Step 2: Use a straight nose pliers and curl the end of the wire under and press it firmly.
Step 3: Measure the length you want ,I measured 4 inch and bend it perpendicular to stone .
Step 4: Wrap it around the stone and twist the end along with already existing wire and press the end with pliers.You can also wrap it twice or in criss cross way .
Step 5: Tada!! Now the stand it ready to display the photos.You can do a lot of variations in this by making different shapes and or letters instead of just coils.You can see the second one in which I made a flower shape.You can also paint the rock if you want to add some color instead of the rough texture.
Step 6: Display your beautiful photos on your desk or anywhere you wish.It is such a cute and temporary way to display your photos.You can also create this and use as Photo plates instead of name plates for parties.I am sure your guests will feel great and wonderful on seeing them :)Off course the credit goes to you!!


Photo display keeps changing as we take new ones during our weekend trips and thats why I like these small and temporary ideas which helps me change the photos frequently without much thinking.Hope these ideas helped you add some photo decor to your space.Which idea you liked the most??Feel free to share your comments below or write to vikalpah@gmail.com.


Friday, June 20, 2014

4 in 1 Asymmetrical All Occasion Clutch

By this time , if you are following me you would probably know that I am fond of 2 in 1, 4 in 1 and reversible kind of stuff when it comes to bags or purses.Whenever I design a bag or purse I always think of How to incorporate multiple uses for a single bag/purse.Well ,It may sound weird to you but that is how my brain works :).I actually came up with this idea when I wanted to participate in a Holiday contest hosted by Velcro brand, Jo-Ann Arts & Craft stores, and Brit +Co. company.The main rule for the contest is that we have to use anyone or more product of Velcro .So, I thought I can make one single clutch with faux leather which can be used for multiple occasion by adding Velcro and fabric skins with different materials like satin,denim, cotton .

I made three covers, two for casual outfits ,one for party outfits.I thought the faux leather clutch which I designed suits for formal or semi-formal outfits.Now let's see How I implemented the idea.

First I made a pattern of the clutch in a newspaper and traced the pattern on to the faux leather.


Then cut the faux leather and prepared the inner layer with solid brown cotton fabric.I just made few basic compartments and also three velcro strips to hang in the keys.(How many times have you thought that you have totally forgotten the keys but it still lies at the bottom of your purse or bag??So I thought a separate place for them using velcro will be great.)


As I did this completely with glue(No sew), I glued the inner part (solid brown fabric)with the faux leather including a cardboard piece for the back panel  in between to give a solid shape.Attached a velcro strip(Loop side) to the hem of the front panel.Glued the sides to complete the clutch.


Next glued velcro(Loop side) to the hem of the flap part.


So, Basic clutch is all done. Decorated the front part with chevron design with fabric paint.Now, comes the preparation of covers/skins part.


A simple design to suit formal and semi-formal outfits.


Made a cover/skin which is slightly bigger(approx half an inch in whole) and perfectly fitting .Used a small strip of heat and bond sheet for the button area to avoid fraying and made a hole for the button.Attached the hook side of the velcro in the same areas.


Ahhhh!!!The cover is ready !!!! Moving on to the fitting test.Here is the result.


It is fitting perfectly!!!Now the clutch has got a Whole new look. Do you agree??A bright green color to suit for the casual outfits to take along for a hangout with friends or shopping.

From a formal look to a casual look.!!!


In a similar way prepared two more skins with denim and satin material.Satin material was quite challenging to work with.I did not get the result at the first time as it was fraying a much and for some reason, I did not get the fit.So, I used heat and bond sheet and completely covered the material to make it little stiffer and then tried.This time I got the result.Yay!!!


One more to suit for all casual outfits.A perfect match for all denim.


A golden color clutch with satin and some rhinestones to suit for all party wears.


Is it not as simple as that?? When there is multiple occasion on the same day, you don't have to worry much your clutch/purse, you can just take a cover/fabric skin that it suitably for the occasion .And, that's it !You are ready to Rock!!!

And the Happy moment is I got runner up for this idea !!!Woohooo!! All the hard work got paid !!!Would be great if someone sponsors me to make this idea a commercial one !! (Just Kidding :P) 

Would love to thank all the sponsors for giving me such an opportunity to bring out my ideas to the world :)

If anyone is going to try this idea , please let me know.And Ladies(Of course Gentlemen,Would love to hear from you too :)),What do you feel about this clutch ??Will you be excited to have one like this?? Talk to me in the comments below.

Tuesday, June 17, 2014

How to make different types of bows !!

Bows are perfect gift toppers.When you don't have a quite attractive gift wrapping paper you can always go with kraft paper and make your gift more attractive by decorating with bows. :)In my London bridge- Keepsake gift postI showed How I wrapped a gift in last minute and added a bow to spruce it up a bit.One of my Blogger friends asked me if I could show a tutorial on How to make a flower bow.So, here comes a complete instruction of how to make different types of bows.
gift bows using different materials like newspaper, duct tape, ribbons, etc


You can use any kind of materials like scrapbook paper,construction paper,newspaper,duct tape,magazine paper, ribbons and even maps (ya!you heard it, right!Those maps which you collected from your vacation trips!).

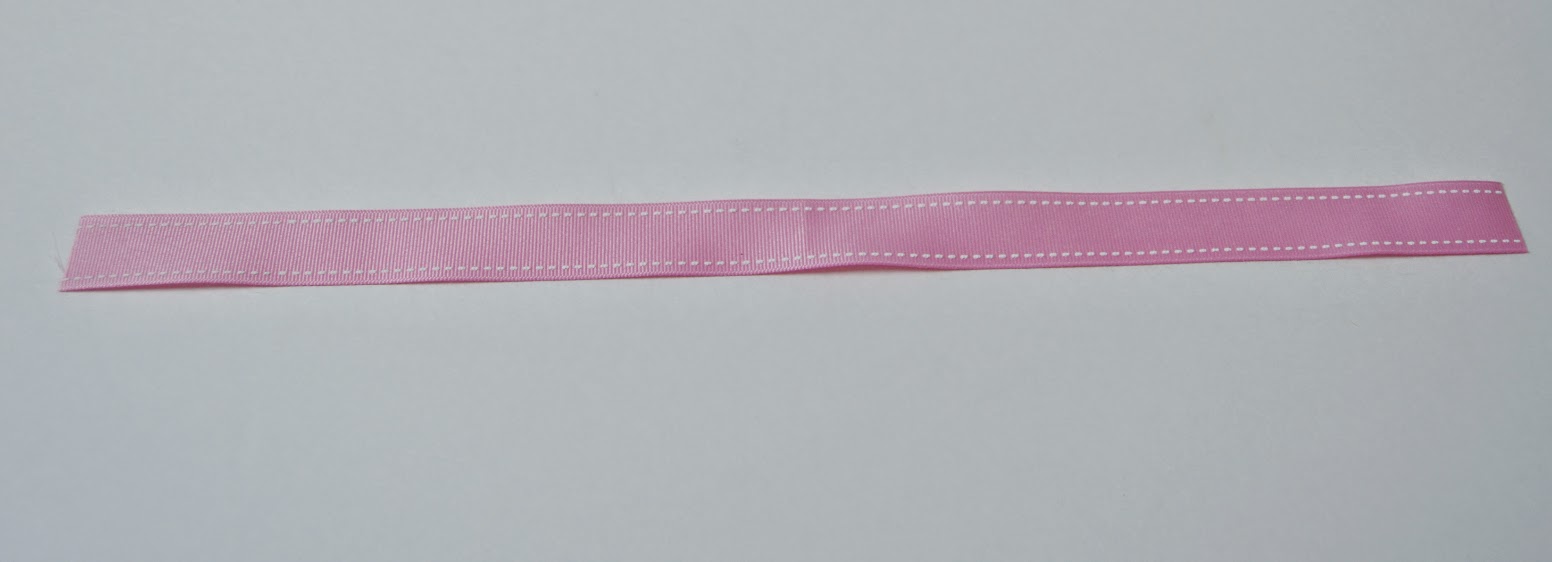
Type 1: A simple bow.(Let's start from basics!! :))Take a 17" inch length of a ribbon.Fold it in half and make a crease to mark the center point.


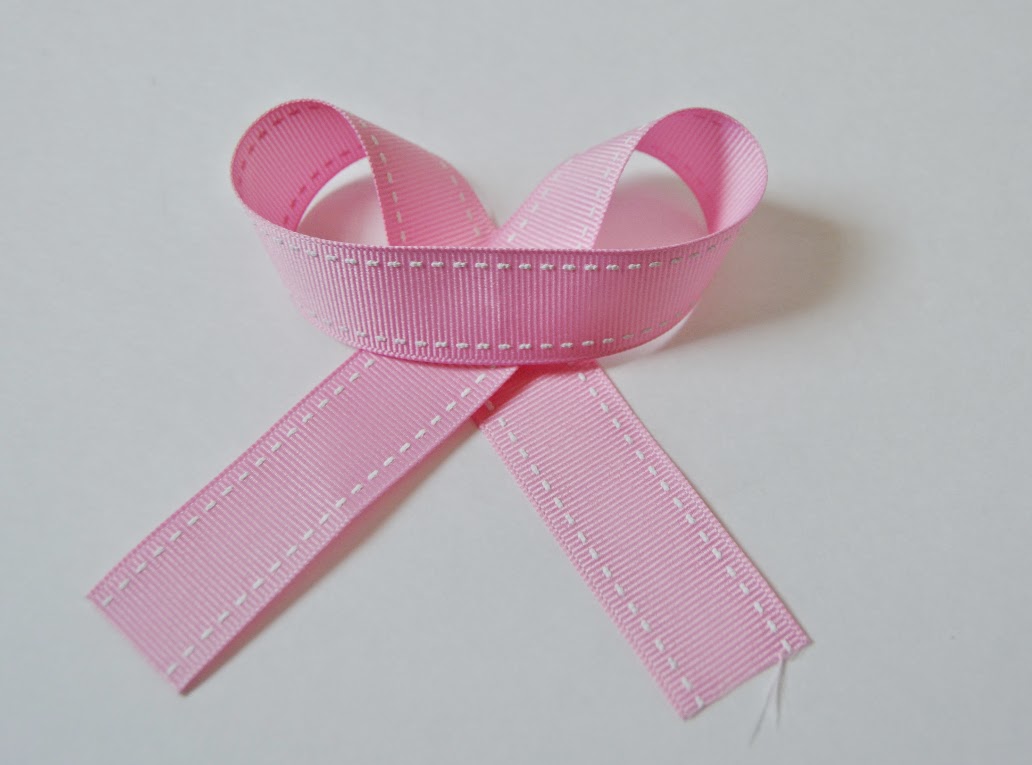
Take one end of the ribbon and make a twist and bring it under as shown.


And repeat the same on the other end. 


After this step make sure the ends are crossed and a drop a dab of glue or staple to hold .Cut the ends of the ribbon in V shape to avoid fraying. Glue a button or a sticker to complete the look of a simple bow. Isn't it very simple???


Type 2: The big swirly flower bow. I used newspaper to make this bow.This bow can be made smaller or larger than this.I am sharing the size which I used to make the bow .
22"inch length --> 5 strips
11" inch length-->5 strips
3.5"inch length --> 1 strip
Width is 1" inch for all strips.

Take one 22" inch strip ,fold it in half and make a crease to mark the center.
Take both the ends and bring it to the center point and staple it.


Do the same for all the 5 strips and arrange them one above the other forming a circle.Staple them at the center to hold it together.

Do the same with 11" inch strips forming a shorter circle.


Place smaller one above the larger and staple them.


Take the 3.5 " inch strip fold them in half and tape it.Stick it in the center with a double sided tape or fold a strip of clear tape at both ends and stick to the folded strip and then stick the folded strip to the center of the bow.Voila!!!Now you have a beautiful big bow !!!


Type 3: It is a swirly, lengthy bow.I made this with ribbon.For this you will need,

8.5" inch length --> 2
6.5" inch length --> 2
4.5" inch length --> 2
3.5" inch length --> 1

Fold the both 8.5" inch length ribbon pieces into half, overlap one over the other and staple it.Do the same with 6.5" and 4.5" strips.Place one over the other and use 3.5" ribbon strip to make a circle and staple it at the center.


There are many alternate ways that you can make this type of bow. One is you can use a continuous length of ribbon to make these swirls as you desire and staple it at the center .Two is you can make the strips as continuous one instead of two pieces in each length i.e 17" , 13" and 9" strips and follow the same procedure.

Type 4: This is a twisty type of bow.For this, you will need, 3 strips of 11"inch long and one 3.5" strip for the center.

I made this with duct tape on one side and magazine paper on the other side.Stick the duct tape as shown , leave some tape on both the ends to make the bows easier to stick.I personally felt the width is too long so ,I cut them into half.


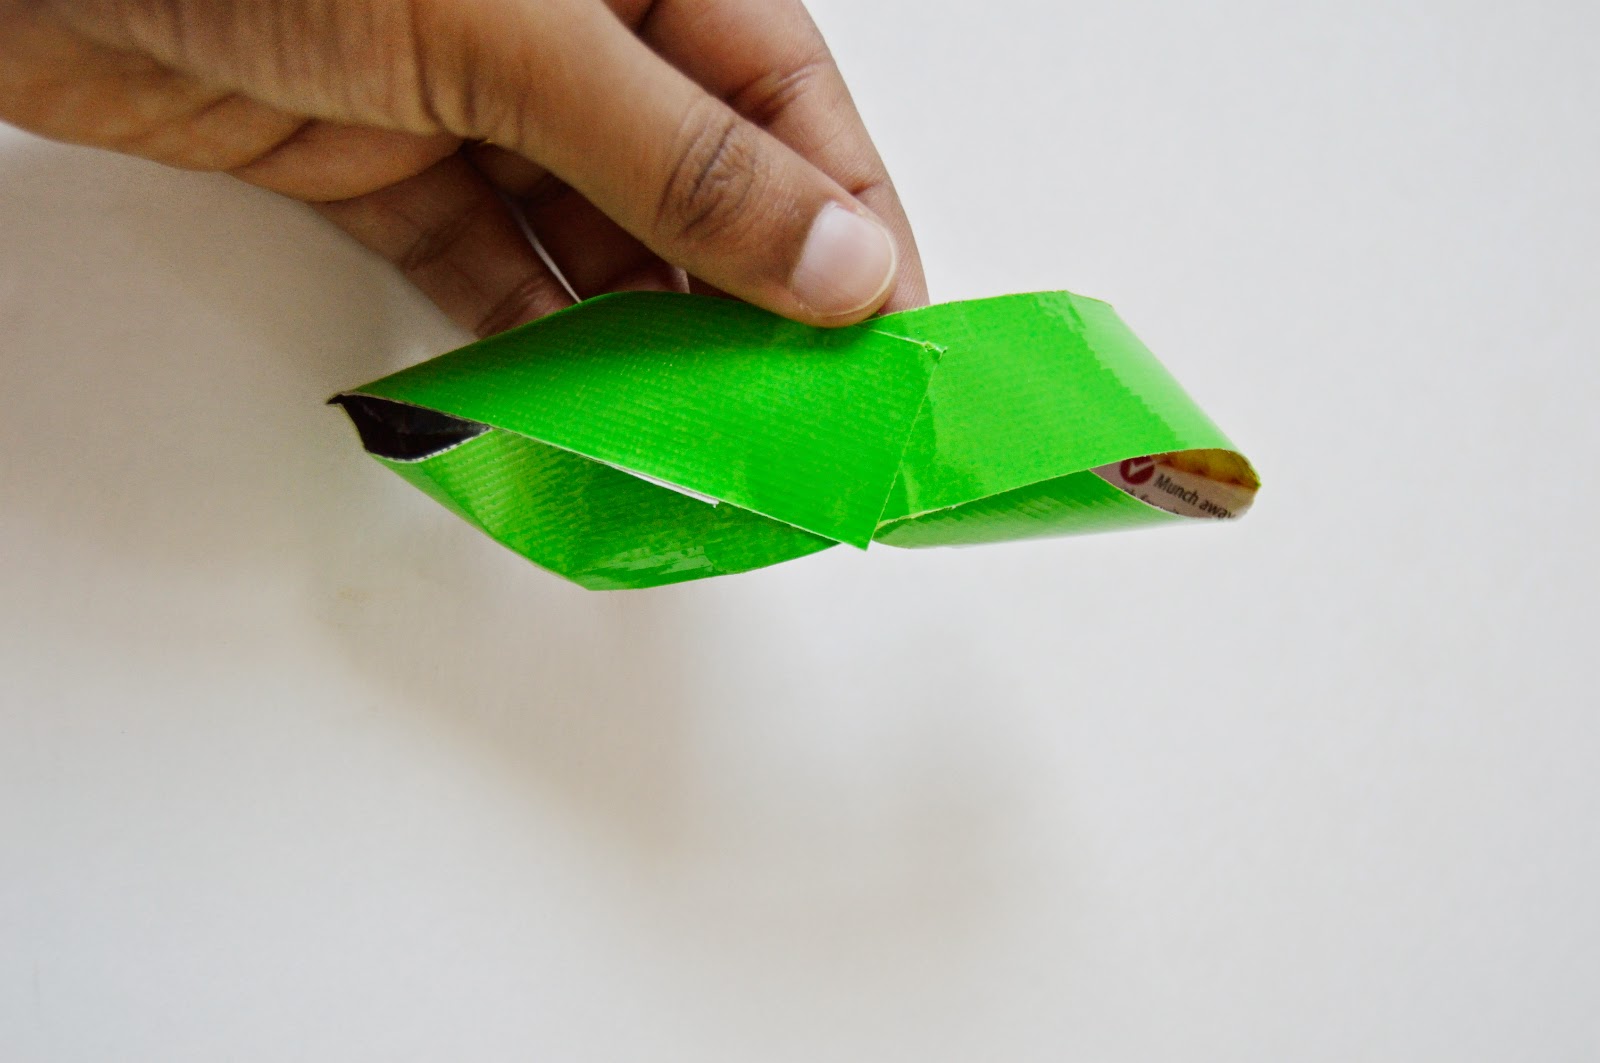
 Now we are going to make the strips look like 8.Start by twisting it(Clockwise) as shown to make the upper side of 8 .


Now take the other end and twist it in an anti-clockwise direction to make the lower side of 8 and stick it at the back.Use the small sticky tape that is left on both the sides to secure it in place.


Make all the three strips as shown above and place one over the other and use glue or tape to stick it.Complete the center with a small strip same as in the big swirly flower bow .Tada!!!You got another beautiful bow to decorate your gifts.


Hope you enjoyed learning the different types of bow.Which bow you liked the most ?? And in what material would you like to do it ?? Will you be making any of these when you gift someone next time ??Share your comments below. If you have any doubts, feel free to contact me at vikalpah@gmail.com.As always I will be happy to hear from you.

Other gift wrapping ideas you might like,