Friday, February 28, 2014

2 in 1 No sew tote bag

A Tote bag is always a handy one when you go for shopping ,a road trip ,library ,etc.I made two for myself ,one to take it to library and for shopping.But,I don't have a sewing machine to sew one :(.So,I came up with the idea of no sew version replacing sewing machine with stapler and thread with staples.Are you wondering whether this will work ?? Even I had no clue before trying it but it worked very well for me.I tested with about 6 big books and it was sturdy enough.Believe me!!Give a try and you will be happy for sure :) :).Lets get started.

Materials Used :

1.Upholstery vinyl -->half yard
2.Webbing for straps -->1.5 yard(approx 25 inches for each straps)
3.Ruler to measure
4.Stapler
5.Staples
6.Masking tape(Optional)
7.Duct tape
8.Martha Stewart Adhesive stencils(Optional)
9.Scissors
10. Martha Stewart Multi surface Acrylic paint(Optional)
-You can also use fabric paint but I am not sure whether normal acrylic paint will work on vinyl,so be sure to test a small area before you try
11.Foam Brush (Optional)

Step 1: Measure and cut the two pieces of vinyl about 20 inch X 18 inch each and webbing about two 25 inch pieces.Fold and crease the top hem for 2 inches and mark the 5 inches from the ends for the straps.
Place the webbing on the wrong side(Picture 1) and fold the strip on to the right side(Picture 2).Now start stapling the straps ,make sure that you staple only on the 2 inch fold so that the staples won't show outside.


Step 2: Fold the 2 inch hem on the top(Picture 3) and cover the hem with duct tape (Picture 4).


Step 3: Now comes the fun part, painting !!!I wanted my tote to be 2 in 1 so I decided to go with classy pattern on one side and trendy pattern on the other side.For classy pattern I used Adhesive stencils and for trendy look I made my own design with masking tape.You can customize your tote according to your taste and colour. If you feel this step as tedious work you can go with printed vinyl fabric .If you chose cotton prints/any lighter fabric make sure you cover the wrong side fully with the duct tape as lining making one strip slightly overlapping the other(refer the picture below).This is done for strength as staples will tear the lighter fabric and ruin your work.(We don't want that to happen,rite ?? :))
If you are use light fabrics like cotton,make sure you line the wrong side(Inner) with duct tape as shown.This picture shows the inner side of the completed bag but when you make the lining do this step before stapling the sides

This picture shows How I made the design with masking tape and painted above it.

These are the two panels of the bag.Trendy one and the classy one.

I made this design for another bag.So this is just for your inspiration.

Step 4: Once the paint is dry ,place the right sides facing together and start stapling all the three sides leaving 1/4 inch seam allowance on the sides.

Step 5:To make a gusset (Bottom panel), turn the bag in such a way the side seams are at the center and make a triangle  pointing downwards on both the sides(Left & Right)(Refer picture below).Measure 4 inches perpendicular to the side seam and staple along the line(as shown).

Step 6:Open the seam and cover it with long pieces of duct tape.Do this to cover the side seam and bottom panel.Voila !!!You are done.Turn the bag inside out to admire your beautiful work.Hang the bag in your hand  and start posing for selfies !!!Click!Click!Click!!.What's next ??Sharing the pic!Don't forget to share the picture with me if you try this bag.I will be happy to see it . :) :) If you are in Instagram #vikalpah so that I can see your creations.


Some Extra points :
1)If you want to iron the vinyl ,Use a damp towel on the vinyl fabric and iron it on the top of the damp towel in "No steam" setting.
2) I have not tested the strength of the tote bag made with cotton fabric so if you try it , let me know whether it passed the durability test :)
3)I made two lines of stapling for the library tote which I made for extra safety.So, If you have decided to carry any heavy items in the tote ,go with two lines of stapling .(It is always better to be on the safer side than to be sorry later :)).
4)So thinking about how many Staples I have used ??I have half a box left even after completing two tote bags.
5)Duct tape-->You will probably need 20 to 30 yards(approx 1 and 1/2 scotch duct tape) if you are giving a complete lining with duct tape.If you are just using it for closing seams then you will need less.

Make sure you have all supplies in hand before starting !!Have fun making your own tote bag!!I had lot of fun making my own bag !!!Don't forget about the Click !Click ! Click! I said before!!! :)

Feel free to ask me any doubts in the comments below or write to vikalpah@gmail.com.Share it with your friends on Facebook ,twitter ,google + or pin it for later.

Sharing this post in East Coast Creative Blog!Please do take a look and support me and all other wonderful bloggers out there.Thank you !!!!




Wednesday, February 26, 2014

How to get organized using cereal boxes

Last week we saw how to organize plastic bags.If you missed it,click here.Now we can see how to organize your mail or any little random things you have at home.Everyone will be having cereal boxes at home without knowing what to use it for.Today let us see two ways of putting it to use.

Creating a box with compartments:
Materials used :
1 Large cereal box(Large I mean the one from BJ's or Costco)
1 Normal cereal box
Wrapping paper
Glue/Mod Podge
Ribbon(Optional)
Magnetic strips(Optional)
Clear tape (Optional)

Step 1: Normal we will open the cereal box on the top.Here we are going to close the top with glue/tape and open the side to create a lid for the box.(As shown).Wondering what to do ,if you have already cut the top opening randomly.Don't worry !!Just trace the box opening on another cereal box,cut it and paste it.


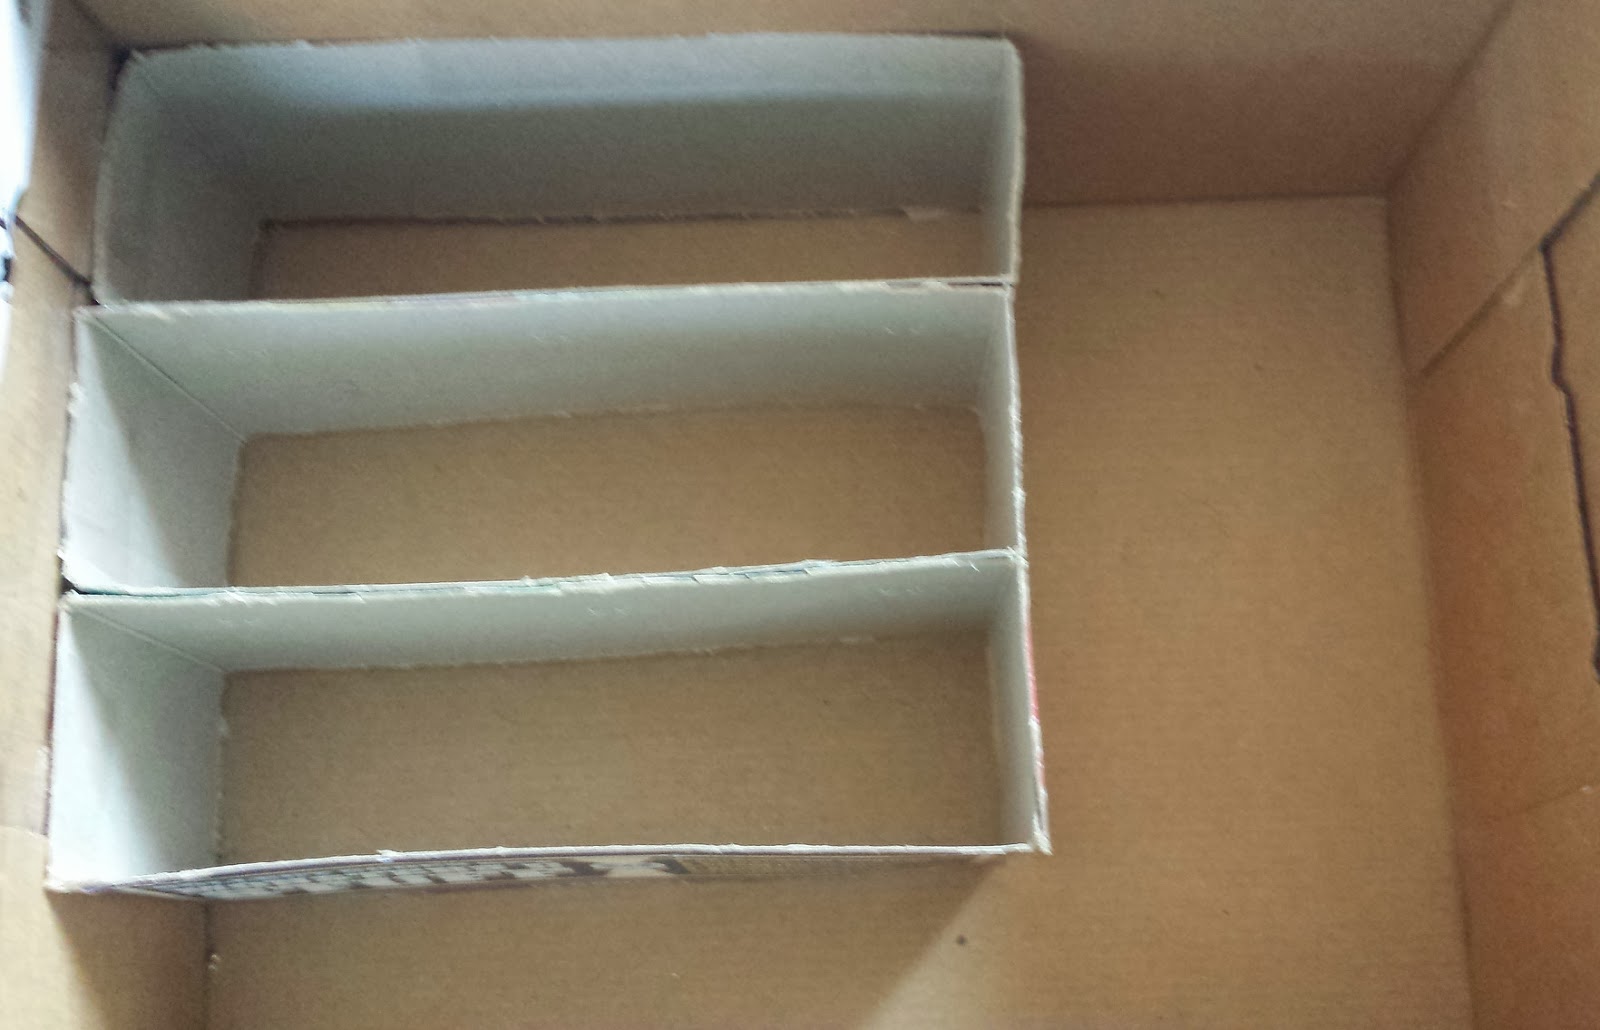
Step 2: Now we are going to create compartments .This is totally up to you to decide how many compartments you need ,based on what you are going to keep inside.I wanted mine to be the size of normal cereal box .So what I did was,cut the cereal box into three parts along four sides of the box and arranged it together to form compartments and glued.If you want different sizes ,just fold the cut piece into required size to form a box shape and glue/tape.


Step 3:Wrap the box with wrapping paper of your choice.I made a small ribbon and attached to the front ,you can very well use anything from stickers to ribbons for decorating.I glued magnetic strips in the lid and the box front as a closure but it is optional.You can also cover the inside of the boxes with wrapping paper but again it is optional :).Voila!!Now the box is ready to use!!Doesn't it look like those store bought boxes?
Magnetic strips added to the lid and front side as closure

This is how I use the box to organize my craft supplies


I use my box for storing my craft supplies like beads, findings, tape,buttons,etc.You can use it for organizing mails ,coupons and of course anything that is need to be organized at your home.

Creating Holder for mail/ magazines
Materials Used :
1 large Cereal box
1 Normal cereal box
Contact paper/Wrapping paper.
Glue /Mod podge

Step 1: Remove the top cover of the box and cut the box to create a opening (as shown).I used the normal cereal box to go inside the large one to create two racks.If you don't have 2 sizes of boxes, just glue the second box to the first one.As it should look like a step for easy access, make the cut of the first box lower than the second.You can create as many as you want.You can also add small boxes at the sides to hold pen and pencils.

Step 2:I used a contact paper with wood grain design to give a look like it is made of wood :) to cover the box.You can very well use any wrapping paper and glue/Mod podge to cover the cereal box.Voila!Our new magazine holder is ready to use !!


What do you think of this idea ??Feel free to share your comments or ask any doubts in the comments below or write to vikalpah@gmail.com.I will be happy to hear /help you.

Saturday, February 22, 2014

DIY Flowers & Vase

Spring is around the corner but it is still cold here in New York.I can't wait to see the spring blossoms, so I decided to make my own bunch of flowers to bring the freshness of Spring into our house.I had been collecting white cup cake liners from a big box of butter cookies and also had a tropicana juice bottle.I thought the shape of the bottle would be perfect for a vase and made a bunch of flowers with the cupcake liners.Let us see how to make it.

Materials Used :
Cup cake liners
Glue (I used glue gun)
Floral wire/Pipe cleaners
Floral tape(Optional)
Any vase of your choice(I used Tropicana bottle as vase)
Acrylic paint(colors of your choice)
Acrylic sealer
Sandpaper(Optional)
Masking tape (Optional)
This Photo is taken from Google images.With this bunch of white roses as an inspiration I started to make my own bunch of  flowers


Step 1:Take a cup liner and a floral wire folded into half.Make a slit in the center of the liner to insert the floral wire.(If you can find floral wires you can also use green pipe cleaners,I got mine in Dollar stores)Make a bend in the wire(Picture 1) and glue a zigzag folded liner on it(Picture 3).Start gluing zig zag folded liner all around the base liner till you are satisfied.I glued 12 liner one above the other making two tiers for a single flower.(Picture 4)


Step 2:Randomly glue the outer edges of two liner to cover the center part and look like a complete flower(Picture 6).If you are going to make a bouquet of flowers wind the floral wire with floral tape to look like real flowers(Picture 7).There is no exact procedure to do this , you can try making flowers in whichever way it is easy for you.I found this way is easier.I tried two or three ways to do it but there is no big difference in it , you can see it in Picture 9.All the flowers look alike.To add a pop of colour , you can use colourful cup cake liners.


Step 3: To make a bunch of flowers ,I used two flowers in the center and arranged the remaining 5 flowers around that to create a round bunch of white flowers.I connected the gaps by gluing the outer layer of each flowers and twisted all the wire together to keep the flowers intact.

A bouquet of white roses


Do you know that white roses were used as a "symbol of love" in early traditions? To know more about, click here History and Meaning of White roses

Step 4:Now to the vase, remove the label from the bottle (Use any bottle or vase of your choice) and clean it with rubbing alcohol. As I used a plastic bottle, I sanded the surface(and cleaned it with rubbing alcohol) and then used 4 coats of acrylic paint leaving it to dry for 15 to 20 minutes between each application.Then used gold paint to add two stripes and to cover the top cap area To create stripes, I used masking tape .You can paint any design you want.After it is dried ,I sealed with acrylic sealer to avoid the paint from peeling off.(You can also use hair spray to seal it ).Voila!You now have a beautiful bouquet of flowers and vase to welcome Spring.:)


What would you use as flower vase?Do you buy one or reuse the bottles at home??Feel free to share yor views in the comments below.
Have fun crafting !!


Wednesday, February 19, 2014

How to organize plastic bags

Even though "Go Green" is spreading everywhere, still we use plastic bags during our shopping that too mainly a lot during our grocery shopping.As an individual everyone has the responsibility to save our planet earth by avoiding plastic(But that is a difficult part !) and if we use we have to recycle it in a proper way.I reuse grocery bags for garbage bins and what do you use it for ??There are lot many reuse for it but keep in mind to recycle properly :).Now to the organizing part, I hate to save plastic bags inside a big plastic bag and dump it till it overflows.Instead I use the below way to keep it organized neatly.Let us see ,how it is done.

Materials Required :
A whole big bag of dumped plastic bags (The one you already have :))
Carton box (you may also have some shipping boxes from amazon :))
Packing tape
Scissors
Stay organized!!Check below steps on How to do this :)


Step 1:To make a roll of plastic bags same as your paper towels rolls.Fold your plastic bag in half (as shown) leave the handle of the first bag to peep out and roll the remaining .When you come to the end ,place the handle of the next bag above the first one and roll it over.Repeat this steps and make a roll of bags that fit in your box.If you don't have carton boxes ,you can also use wipes container.


Step 2: Make a small opening with scissors for pulling a bag out and keep the roll inside the box .(As shown).Secure the sides with the packing tape.If you want you can decorate it.To reload the bags roll, open the box on the other side,load it and then secure it with two rubber bands on both the sides, if you don't want to use tape every time.Voila!You can now use this box as your tissue boxes :)


I made two boxes ,one for our guest room and one for our car.It will be very useful to have it in your car during your road trip or unexpected beach trips(especially if you have kids) but again be sure to recycle it properly :).It will also help your guests who stay in your house for one or two days and they may need a bag to put their used clothes :).If you make this where will you have this box ??
Stay Organized !!But don't forget to ReUse-Reduce-Recycle!!!

Saturday, February 15, 2014

Eyeglass Case Makeover

Do you have good eyeglasses and a boring case for it ?Do you avoid wearing your eyeglasses just because you feel shy to take your boring case outside?You got the answer.You can give a beautiful make over to your eyeglasses case and make your friends ask, Hey girl!!Where did you get your eyeglass case ? and be proud to say "I myself made it !".Lets us see ,how to do it.

Materials Required:
Eyeglass case
Fabric of your choice(approx 8 X 8 inch) -I used printed cotton
Glue gun/Any strong glue that doesn't affect fabric.
Scissors

Step 1: To cut your fabric , keep your case on the wrong side of the fabric and measure 1 inch from all the corners and cut .With this as a pattern prepare another piece.I would recommend using lighter fabric so that it will not be bulky to close your case.
Step 2: Mark and make a slit(as shown) for about 1 cm in the area where your case has hinge(as shown).Remove the inner cover from your case.There is no big deal to remove it but be careful not to tear the inner cover.Be patient and just give a little pull , it will come off.Don't be shocked to see the inner rust area :) both the cases I worked was like that.If you want just wipe it with a damp towel and move on to the next step :)


Step 3: Fold the fabric in the area where you made the slit and insert remaining  fabric inside the cover(as shown).Now glue the folded part and then glue remaining fabric inside the cover (as shown in the picture).I used low temperature glue gun.Work in parts to avoid wrinkles and also to avoid drying of glue.

.
Step 4: Repeat the same procedure for other side.Glue the inner cover. Voila!!Now you got a new eyeglasses case.

Finished look of back side

Inside look of both the cases I made


Did you like this makeover ??Tell me in the comments below.If you do this makeover, what fabric colour will you chose?
If you like this makeover,feel free to share it, tweet it or pin it in your DIY board.

Friday, February 14, 2014

Personalized Mickey & Minnie Fridge Magnet - VDay gift

Everyone wants to give something different each time when we gift our loved ones.My friend has seen me playing with clay ,she believed in me and asked to do a Mickey & Minnie fridge magnet with clay.So she sent me a photo of Mickey & Minnie (2nd Picture) and I came up with the below one :).To add that personal touch ,stamped first letter of their name in Mickey & Minnie's cap as requested by her.

This Picture is taken from internet.


Thursday, February 13, 2014

Polymer Clay jewelry

After my first try on Candy Crush pen holder, I tried to make some rings , pendant,earrings and bracelets for one of my pink t-shirt.I thought instead of making something and keeping it inside a box, why not a matching one for any of my clothes.So that I can wear it .I got many nice comments which made me try more on jewelry.My learnings and experiments are still going.Hoping to make some beautiful jewelry with new techniques I learn and share it with you all.Till then here are few , which I made so far.


Made these for my cousins in their favourite colours


Follow my blog with Bloglovin

Christmas Special - Polymer Clay Fridge Magnets

I made these while ago in October for Christmas.Even though we don't celebrate Christmas, just to have the feeling of festive season I made Snowman, Santa and Christmas tree.

Personalized Santa 
How do they look ? Feel free to share your comments below.

Polymer Clay Car Key chains

When I think of what to gift for men,other than wallet,shirt,watch nothing strikes my mind that suddenly.It takes a little time for me to think something different other the things mentioned above.That too when I want to make something handmade and same time a useful one ,it takes a little more time.Do you agree ?When our friend got a new car ,we wanted to congratulate him with some gift.So I came up with a idea of making a key chain with a small clay car which looks same like his new car.And here is the result ...


Made two more to gift it to two other friends for completing their New York Marathon successfully.I wrote the minutes they completed on the under side.


What do you think of this idea ??How excited would you feel to have a car key chain that looks same as your own car ??